
นอกจากจะใช้ s3 storage จาก rook ceph แล้ว Velero ยังสามารถเชื่อไปยัง S3 compatible อื่นๆ ได้ ตัวอย่างนี้จะใช้ Nutanix Unified Storage สำหรับเก็บ file backup ของ velero
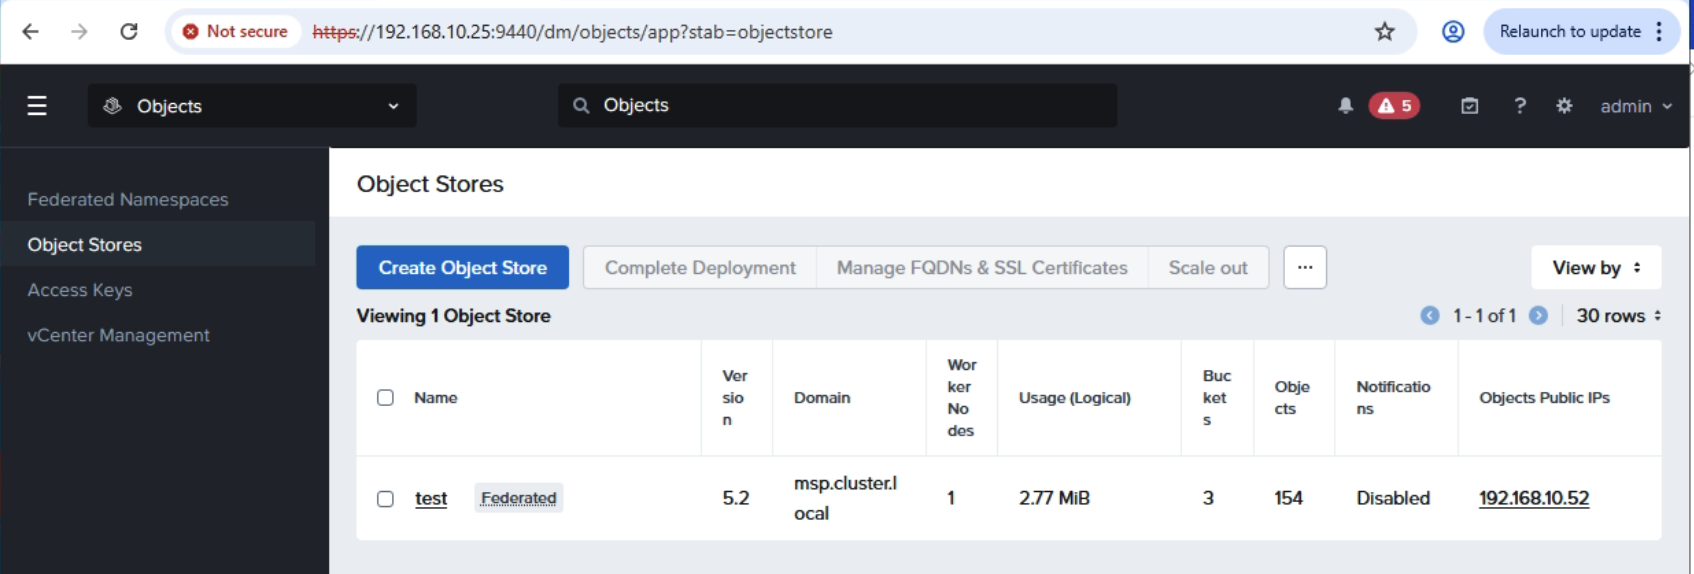
เริ่มแรกต้องสร้าง Access Keys ตามด้วย Object Store จากนั้นเข้าไปยัง Object Store ที่สร้างขึ้น
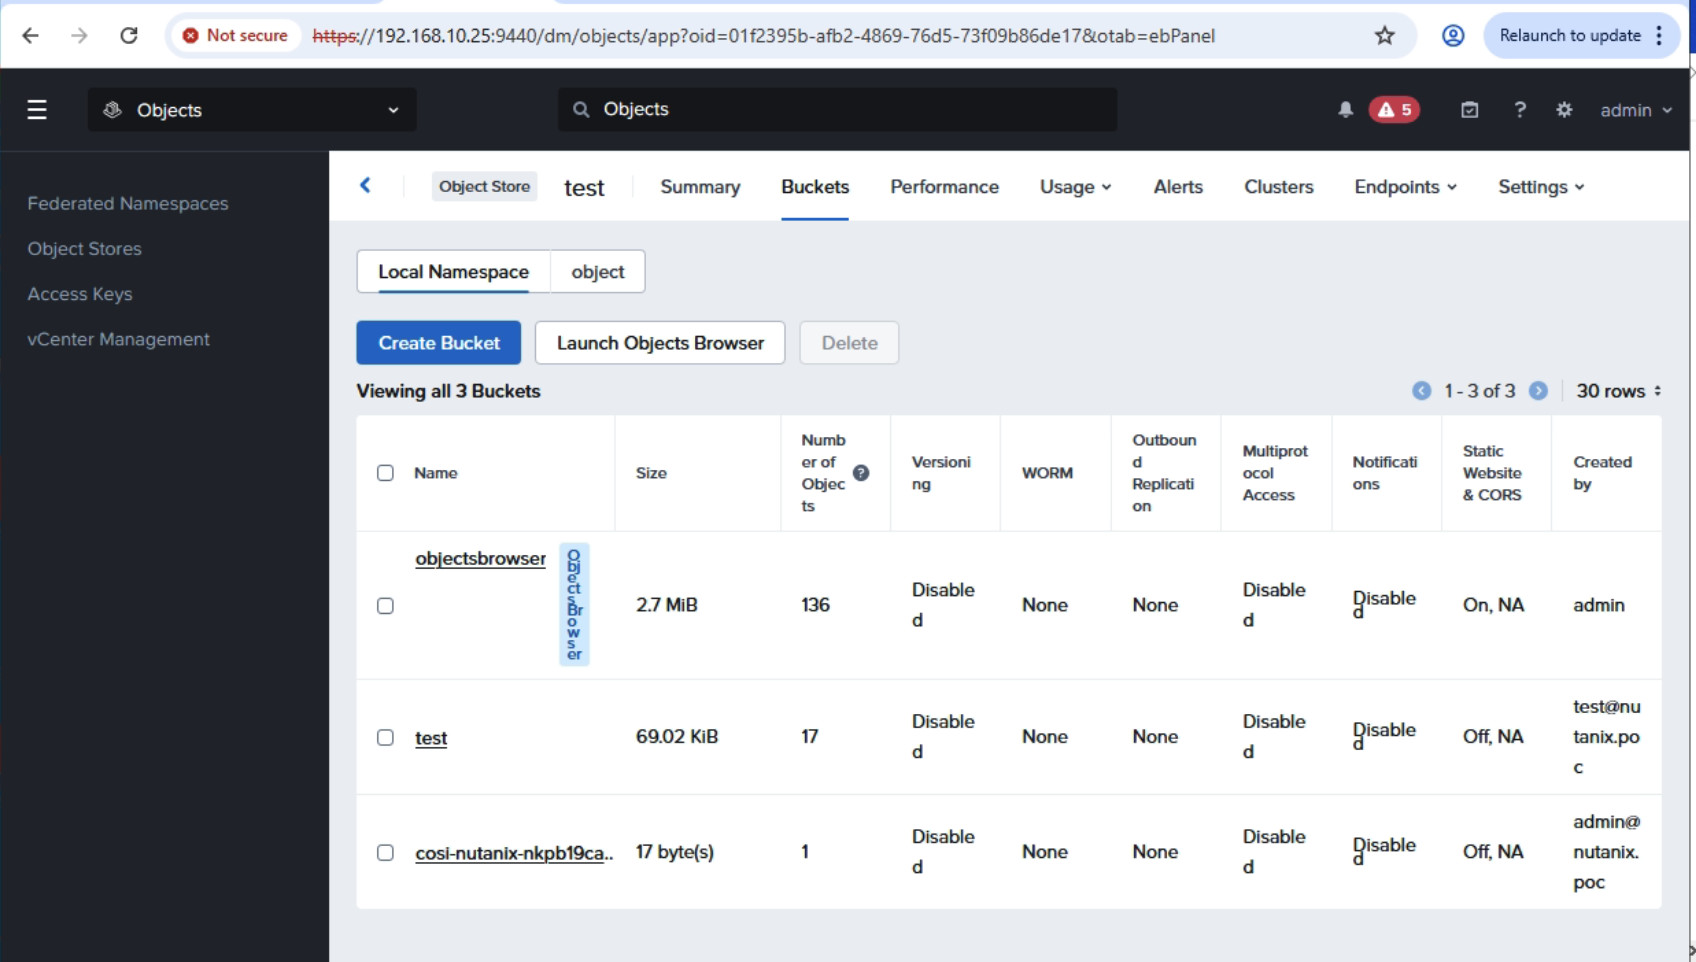
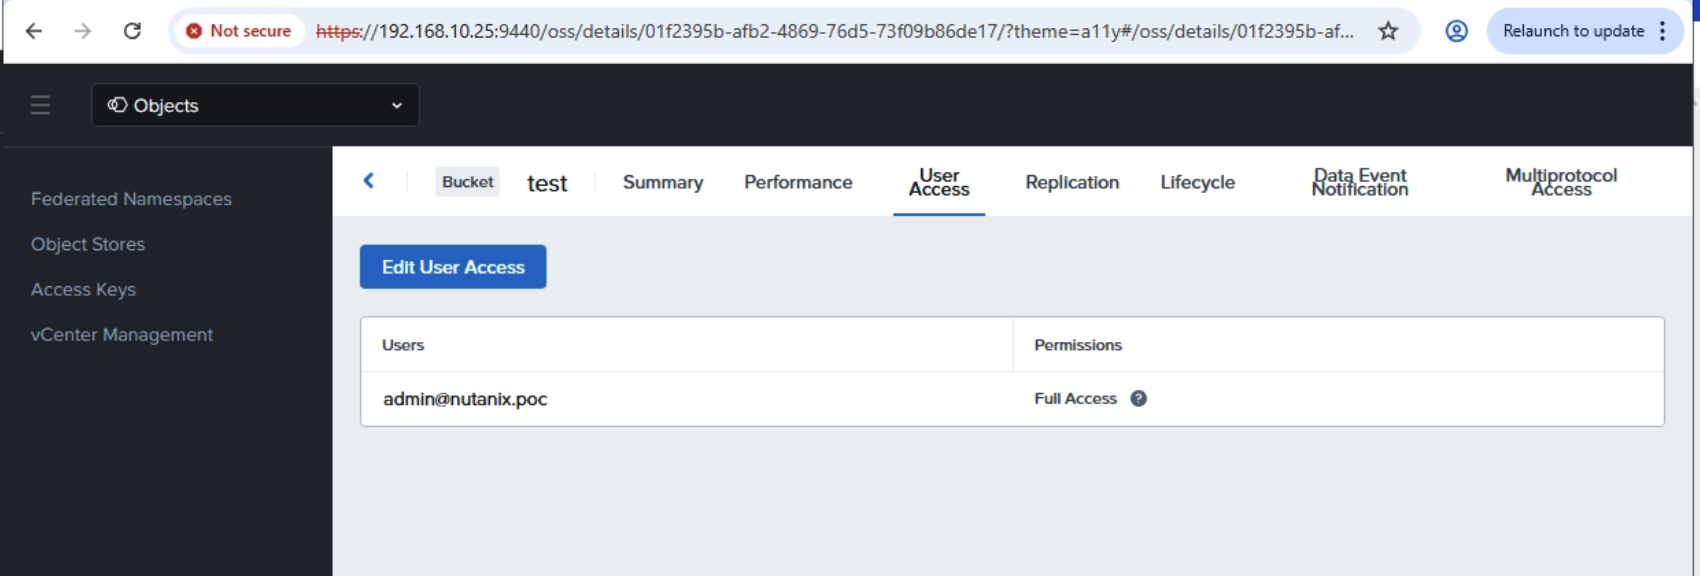
สร้าง Bucket เพื่อเก็บ file backup ตัวอย่างนี้ได้สร้างไว้แล้วชื่อว่า test เข้าไปที่ test bucket และทำการกำหนดสิทธิ์ให้กับ user ที่จะเข้าใช้
หลังจากเสร็จขั้นตอนการเตรียม S3 Storage แล้วให้สร้าง secret บน Kubernetes ที่เราต้องการจะ Enable Velero ด้วย yaml ไฟล์ดังนี้
apiVersion: v1kind: Secretmetadata: name: s3-velero-credential namespace: developtype: OpaquestringData: aws: | [default] aws_access_key_id = VYV5zb29jP-SttqznAn6h8WejBeBZTZj aws_secret_access_key = SbjeQIEf5iZQMc8-uwvtsezBjC5lZaHOจากนั้นทำการ enable Velero ที่ NKP Application Catalog ด้วย Configuration file ดังนี้
configuration: backupStorageLocation: - bucket: test prefix: velero config: region: us-east-1 s3Url: https://192.168.10.52 s3ForcePathStyle: "true" insecureSkipTLSVerify: "true" profile: default provider: aws credential: key: aws name: s3-velero-credential features: EnableCSI uploaderType: kopia volumeSnapshotLocation: - config: region: us-east-1 s3Url: https://192.168.10.52 provider: awsdeployNodeAgent: trueinitContainers: - image: velero/velero-plugin-for-aws:v1.13.2 imagePullPolicy: IfNotPresent name: velero-plugin-for-aws volumeMounts: - mountPath: /target name: plugins metrics: enabled: true serviceMonitor: enabled: true nodeAgent: annotations: secret.reloader.stakater.com/reload: s3-velero-credential priorityClassName: dkp-critical-priority resources: limits: nullหลังจาก Enable เสร็จแล้วตรวจสอบ ว่าระบบได้มีการ backupStorageLocation และ volumeSnapshotLocation ได้ถูกต้องและพร้อมใช้งาน
[root@guest-bastion-server-1 velero]# kubectl get backupstoragelocations -ANAMESPACE NAME PHASE LAST VALIDATED AGE DEFAULTdevelop default Available 47s 2m59s true[root@guest-bastion-server-1 velero]# kubectl get volumesnapshotlocations -ANAMESPACE NAME AGEdevelop default 3m30sทำการติดตั้ง velero cliโดย download ได้จาก github แล้วตรวจสอบว่า velero สามารถมาองเห็น backup location ได้ถูกต้อง
[root@guest-bastion-server-1 velero]# velero get backup-location -n developNAME PROVIDER BUCKET/PREFIX PHASE LAST VALIDATED ACCESS MODE DEFAULTdefault aws test/velero Available 2026-02-16 15:19:42 +0700 +07 ReadWrite true[root@guest-bastion-server-1 velero]# velero get snapshot-location -n developNAME PROVIDERdefault awsติดตั้ง workload เพื่อใช้ในการทดสอบ backup/restore ตัวอย่างนี้จะใช้ mysql
apiVersion: v1kind: Secretmetadata: name: mysql-passwordtype: opaquestringData: MYSQL_ROOT_PASSWORD: passwordapiVersion: apps/v1kind: StatefulSetmetadata: name: mysql-setspec: selector: matchLabels: app: mysql serviceName: "mysql" replicas: 1 template: metadata: labels: app: mysql spec: terminationGracePeriodSeconds: 10 containers: - name: mysql image: mysql:8.0 ports: - containerPort: 3306 volumeMounts: - name: mysql-store mountPath: /var/lib/mysql - name: mysql-data-1 mountPath: /usr/data1 env: - name: MYSQL_ROOT_PASSWORD valueFrom: secretKeyRef: name: mysql-password key: MYSQL_ROOT_PASSWORD volumeClaimTemplates: - metadata: name: mysql-store spec: accessModes: ["ReadWriteOnce"] storageClassName: nutanix-volume resources: requests: storage: 5Gi - metadata: name: mysql-data-1 spec: accessModes: ["ReadWriteOnce"] storageClassName: nutanix-volume resources: requests: storage: 3Giทำการ deploy mysql ไปยัง application
[root@guest-bastion-server-1 ndk-2.0.0-bundle]# kubectl get pod -n applicationNAME READY STATUS RESTARTS AGEmysql-set-0 1/1 Running 0 6h3mทำการ backup mysql ด้วย command velero backup
[root@guest-bastion-server-1 velero]# velero backup create mysql-backup-1 --include-namespaces application --snapshot-volumes=true -n develop --waitBackup request "mysql-backup-1" submitted successfully.Waiting for backup to complete. You may safely press ctrl-c to stop waiting - your backup will continue in the background.............Backup completed with status: Completed. You may check for more information using the commands `velero backup describe mysql-backup-1` and `velero backup logs mysql-backup-1`.ตรวจสอบการ backup และ log โดยต้องมี option –insecure-skip-tls-verify เนื่องจาก storage ใช้ self-signed certificate
velero backup describe mysql-backup-1 --insecure-skip-tls-verify -n develop --detailsดู backup ทั้งหมดที่อยู่ใน namespace develop
[root@guest-bastion-server-1 velero]# velero get backup -n developNAME STATUS ERRORS WARNINGS CREATED EXPIRES STORAGE LOCATION SELECTORmysql-backup-1 Completed 0 0 2026-02-16 15:23:51 +0700 +07 29d default <none>ทำการ delete mysql และ persistent volume claim แล้วทำการ restore
root@guest-bastion-server-1 velero]# velero restore create mysql-backup-1-restore --from-backup mysql-backup-1 --restore-volumes=true -n develop --waitRestore request "mysql-backup-1-restore" submitted successfully.Waiting for restore to complete. You may safely press ctrl-c to stop waiting - your restore will continue in the background...Restore completed with status: Completed. You may check for more information using the commands `velero restore describe mysql-backup-1-restore` and `velero restore logs mysql-backup-1-restore`.[root@guest-bastion-server-1 velero]# k get pod -n applicationNAME READY STATUS RESTARTS AGEmysql-set-0 1/1 Running 0 14s[root@guest-bastion-server-1 velero]# k get pvc -n applicationNAME STATUS VOLUME CAPACITY ACCESS MODES STORAGECLASS VOLUMEATTRIBUTESCLASS AGEmysql-data-1-mysql-set-0 Bound pvc-d48bc1d4-4029-474c-8bf0-aabf98408087 3Gi RWO nutanix-volume <unset> 4hmysql-store-mysql-set-0 Bound pvc-578fb355-9763-463e-9d61-e3f3939977a6 5Gi RWO nutanix-volume <unset> 4h