2026-01-30T14:08:29.823282Z info FLAG: --concurrency="0"
2026-01-30T14:08:29.823327Z info FLAG: --domain="demo.svc.cluster.local"
2026-01-30T14:08:29.823332Z info FLAG: --help="false"
2026-01-30T14:08:29.823335Z info FLAG: --log_as_json="false"
2026-01-30T14:08:29.823337Z info FLAG: --log_caller=""
2026-01-30T14:08:29.823339Z info FLAG: --log_output_level="default:info"
2026-01-30T14:08:29.823341Z info FLAG: --log_rotate=""
2026-01-30T14:08:29.823344Z info FLAG: --log_rotate_max_age="30"
2026-01-30T14:08:29.823346Z info FLAG: --log_rotate_max_backups="1000"
2026-01-30T14:08:29.823348Z info FLAG: --log_rotate_max_size="104857600"
2026-01-30T14:08:29.823350Z info FLAG: --log_stacktrace_level="default:none"
2026-01-30T14:08:29.823356Z info FLAG: --log_target="[stdout]"
2026-01-30T14:08:29.823358Z info FLAG: --meshConfig="./etc/istio/config/mesh"
2026-01-30T14:08:29.823361Z info FLAG: --outlierLogPath=""
2026-01-30T14:08:29.823363Z info FLAG: --profiling="true"
2026-01-30T14:08:29.823365Z info FLAG: --proxyComponentLogLevel="misc:error"
2026-01-30T14:08:29.823368Z info FLAG: --proxyLogLevel="warning"
2026-01-30T14:08:29.823370Z info FLAG: --serviceCluster="istio-proxy"
2026-01-30T14:08:29.823372Z info FLAG: --stsPort="0"
2026-01-30T14:08:29.823375Z info FLAG: --templateFile=""
2026-01-30T14:08:29.823378Z info FLAG: --tokenManagerPlugin=""
2026-01-30T14:08:29.823387Z info FLAG: --vklog="0"
2026-01-30T14:08:29.823392Z info Version 1.23.6-6a112a28410654328342c68f82da48920e34f062-Clean
2026-01-30T14:08:29.823398Z info Set max file descriptors (ulimit -n) to: 1048576
2026-01-30T14:08:29.823719Z info Proxy role ips=[192.168.2.124] type=sidecar id=carts-88b4ddf98-p5gqh.demo domain=demo.svc.cluster.local
2026-01-30T14:08:29.823783Z info Apply proxy config from env {"discoveryAddress":"istiod-istio-helm.istio-helm-system.svc:15012","tracing":{"zipkin":{"address":"jaeger-jaeger-operator-jaeger-collector.istio-system.svc.cluster.local:9411"},"sampling":100}}
2026-01-30T14:08:29.825955Z info cpu limit detected as 2, setting concurrency
2026-01-30T14:08:29.827354Z info Effective config: binaryPath: /usr/local/bin/envoy
2026-01-30T14:08:30.112678Z warning envoy main external/envoy/source/server/server.cc:936 There is no configured limit to the number of allowed active downstream connections. Configure a limit in `envoy.resource_monitors.downstream_connections` resource monitor. thread=14
2026-01-30T14:08:30.114850Z warning envoy main external/envoy/source/server/server.cc:843 Usage of the deprecated runtime key overload.global_downstream_max_connections, consider switching to `envoy.resource_monitors.downstream_connections` instead.This runtime key will be removed in future. thread=14
2026-01-30T14:08:30.123541Z info xdsproxy connected to delta upstream XDS server: istiod-istio-helm.istio-helm-system.svc:15012 id=1
2026-01-30T14:08:30.156633Z info cache generated new workload certificate resourceName=default latency=126.712884ms ttl=23h59m59.843374146s
2026-01-30T14:08:30.156685Z info cache Root cert has changed, start rotating root cert
2026-01-30T14:08:30.156825Z info cache returned workload trust anchor from cache ttl=23h59m59.843176367s
2026-01-30T14:08:30.192919Z info ads ADS: new connection for node:1
2026-01-30T14:08:30.193043Z info cache returned workload certificate from cache ttl=23h59m59.806958673s
2026-01-30T14:08:30.193482Z info ads ADS: new connection for node:2
2026-01-30T14:08:30.193672Z info cache returned workload trust anchor from cache ttl=23h59m59.806329146s
2026-01-30T14:08:31.182561Z info Readiness succeeded in 1.360041593s
2026-01-30T14:08:31.183121Z info Envoy proxy is ready
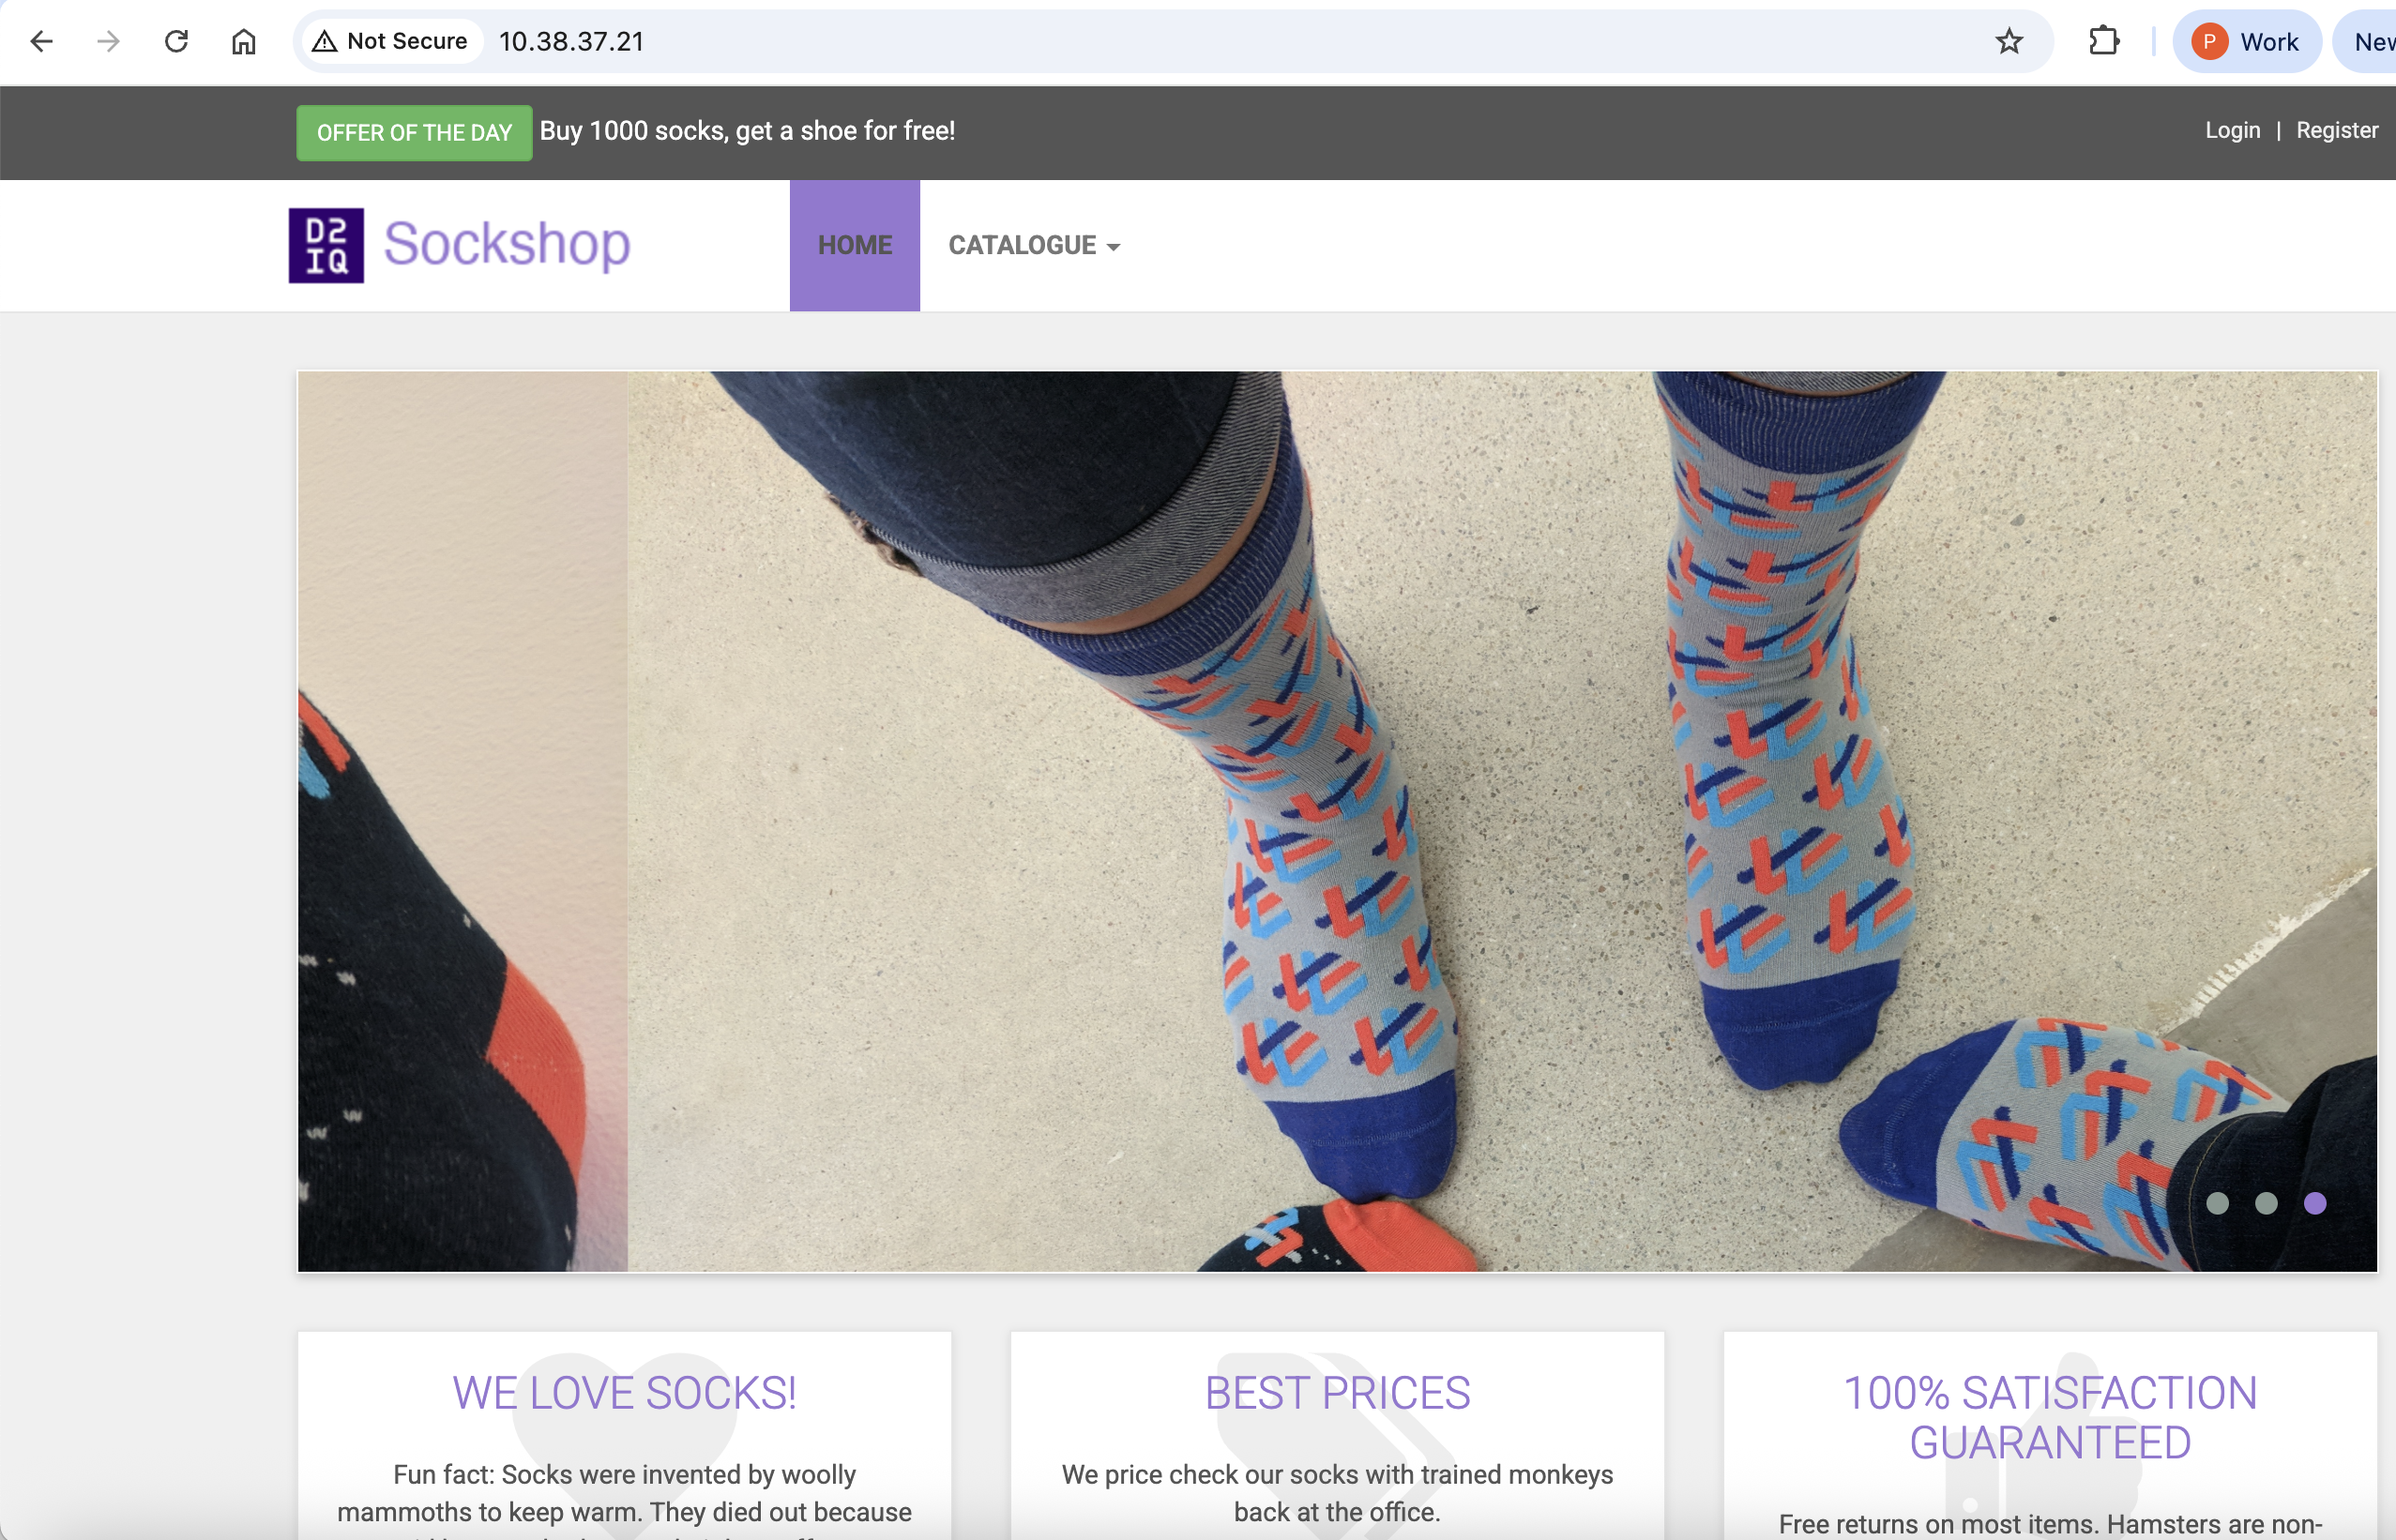
เข้าใช้งาน application ผ่านทาง load balancer ip โดยหา load balancer ip ได้จาก cli
[nutanix@harbor ~]$ kubectl get svc front-end -n demo
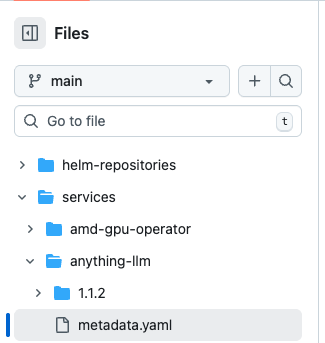
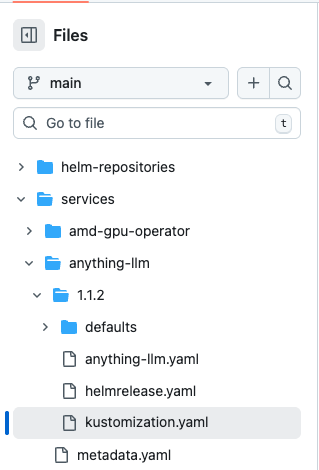
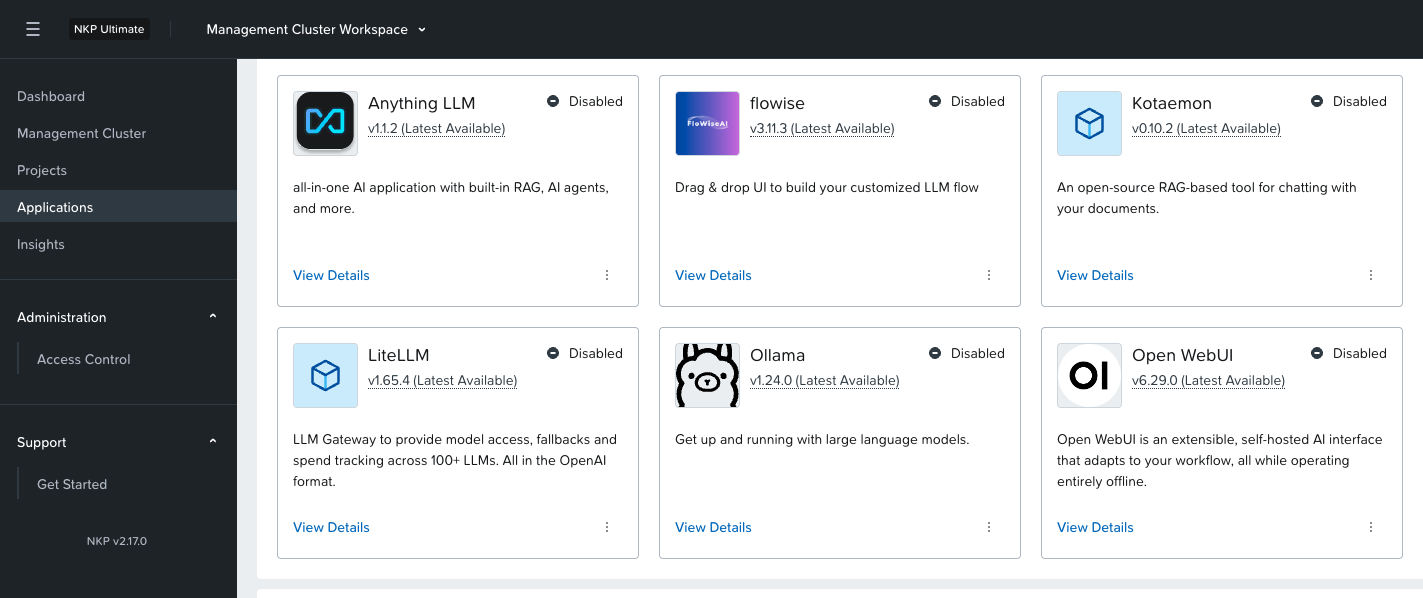
ภายใน folder service ต้องสร้างไฟล์ metadata.yaml ที่มีรายละเอียดของ application ตามตัวอย่าง โดยข้อมูลนี้จะแสดงในหน้า catalog
YAML
displayName: Anything LLM
description: all-in-one AI application with built-in RAG, AI agents, and more.
category:
- AI
type: catalog
allowMultipleInstances: false
scope:
- workspace
licensing:
- Ultimate
- Enterprise
certifications:
overview:|-
## Product Overview
AnythingLLM is a full-stack application where you can use commercial off-the-shelf LLMs or popular open source LLMs and vectorDB solutions to build a private ChatGPT with no compromises that you can run locally as well as host remotely and be able to chat intelligently with any documents you provide it.
AnythingLLM divides your documents into objects called `workspaces`. A Workspace functions a lot like a thread, but with the addition of containerization of your documents. Workspaces can share documents, but they do not talk to each other so you can keep your context for each workspace clean.
### Cool features of AnythingLLM
- 🆕 [**Custom AI Agents**](https://docs.anythingllm.com/agent/custom/introduction)
- 🖼️ **Multi-modal support (both closed and open-source LLMs!)**
- 👤 Multi-user instance support and permissioning _Docker version only_
- 🦾 Agents inside your workspace (browse the web, run code, etc)
- 💬 [Custom Embeddable Chat widget for your website](./embed/README.md) _Docker version only_
- 📖 Multiple document type support (PDF, TXT, DOCX, etc)
- Simple chat UI with Drag-n-Drop funcitonality and clear citations.
- 100% Cloud deployment ready.
- Works with all popular [closed and open-source LLM providers](#supported-llms-embedder-models-speech-models-and-vector-databases).
- Built-in cost & time-saving measures for managing very large documents compared to any other chat UI.
[nutanix@harbor ~]$ curl -o ndk-1.2.0.tar "https://download.nutanix.com/downloads/ndk/1.2.0/ndk-1.2.0.tar?Expires=1752582997&Key-Pair-Id=APKAJTTNCWPEI42QKMSA&Signature=CGOEgIDQHcJ1fTI8nIMbB5mcrM~5jPFcfS~5PyKDFGQyeNGlfBHyookKrzTTearX6L1aLLyEL6psYlkYIZdDlGIghHQuyb5qQBcxVGqiJ2ENuJD2MZKJkBFb6gnJ5s0JynyfkReAwPU5Ls4Vwb9yZXhzROm25Adezn-noLnkQUpLYQkyNl3~3n3X6xWR7qQQhHbo~QH3GEmYylmfsAcfx78WrH6-t9q3AV-2vhOGFNFz8k4gueqbRAjcLiKJBe7pJ-MlQ1KCo2ZYQMg3OACgqx7epi-2t0ImmpKs0I3rGa0lBqccOggX3n0tfaSED1cwTyjFRRpgFGYWZRX0qdrCvQ__"
  % Total    % Received % Xferd  Average Speed   Time    Time     Time  Current
                                 Dload  Upload   Total   Spent    Left  Speed
100  526M  100  526M    0     0  22.5M      0  0:00:23  0:00:23 --:--:-- 30.1M
export APP_NAME=<<application name>>
export APP_NAMESPACE=<<application namespace>>
export TGT_NAMESPACE=<<target namespace>>
***NOTE: target namespace must exist on target cluster (create if necessary)***
~~~~~~~~~~~~~~~~~~~~~~~~~~~~~~~~~~~~~~~~~~~~~~~~~~~~~~~~~~~~~~~~~~~~~~~~~~~~
cat << EOF >  ${APP_NAME}-snap-rg.yaml
apiVersion: gateway.networking.k8s.io/v1beta1
kind: ReferenceGrant
metadata:
 name: ${APP_NAME}-snap-rg
 namespace: ${APP_NAMESPACE}
spec:
 from:
 - group: dataservices.nutanix.com
   kind: ApplicationSnapshotRestore
   namespace: ${TGT_NAMESPACE}
 to:
 - group: dataservices.nutanix.com
   kind: ApplicationSnapshot
   name: ${APP_NAME}-snap
EOF

~~~~~~~~~~~~~~~~~~~~~~~~~~~~~~~~~~~~~~~~~~~~~~~~~~~~~~~~~~~~~~~~~~~~~~~~~~~~
kubectl apply -f ${APP_NAME}-snap-rg.yaml
- verify reference grant exists:
kubectl get referencegrant -n ${APP_NAMESPACE}
--> ${APP_NAME}-snap-rg is in the list of reference grants
ตัวอย่างค่าที่ใช้ในการสร้าง reference grant
[nutanix@harbor ~]$ k create ns newapplication
namespace/newapplication created

[nutanix@harbor ~]$ cat << EOF >  wordpress-snap-rg.yaml
apiVersion: gateway.networking.k8s.io/v1beta1
kind: ReferenceGrant
metadata:
 name: wordpress-snap-rg
 namespace: application
spec:
 from:
 - group: dataservices.nutanix.com
   kind: ApplicationSnapshotRestore
   namespace: newapplication
 to:
 - group: dataservices.nutanix.com
   kind: ApplicationSnapshot
   name: wordpress-snap
EOF

[nutanix@harbor ~]$ k apply -f wordpress-snap-rg.yaml
referencegrant.gateway.networking.k8s.io/wordpress-snap-rg created

[nutanix@harbor ~]$ kubectl get referencegrant -n application
NAME                AGE
wordpress-snap-rg   35s
สร้าง application restore
cat << EOF >  ${APP_NAME}-rg-restore.yaml
apiVersion: dataservices.nutanix.com/v1alpha1
kind: ApplicationSnapshotRestore
metadata:
  name: ${APP_NAME}-rg-restore
  namespace: ${TGT_NAMESPACE}
spec:
  applicationSnapshotName: ${APP_NAME}-snap
  applicationSnapshotNamespace: ${APP_NAMESPACE}
EOF
~~~~~~~~~~~~~~~~~~~~~~~~~~~~~~~~~~~~~~~~~~~~~~~~~~~~~~~~~~~~~~~~~~~~~~~~~~~~
kubectl apply -f ${APP_NAME}-rg-restore.yaml
- verify restore operation completes successfully (can take a few minutes)
kubectl get applicationsnapshotrestore -n ${TGT_NAMESPACE}
--> ${APP_NAME}-rg-restore shows a COMPLETED status of 'true'
- verify all artifacts referenced in snapshot describe operation have been restored on the target namespace:
***For example***
kubectl get all -n ${TGT_NAMESPACE}
kubectcl get pvc -n ${TGT_NAMESPACE}
ตัวอย่างการ restore application
[nutanix@harbor ~]$ cat << EOF >  wordpress-rg-restore.yaml
apiVersion: dataservices.nutanix.com/v1alpha1
kind: ApplicationSnapshotRestore
metadata:
  name: wordpress-rg-restore
  namespace: newapplication
spec:
  applicationSnapshotName: wordpress-snap
  applicationSnapshotNamespace: application
EOF
[nutanix@harbor ~]$ k apply -f wordpress-rg-restore.yaml
applicationsnapshotrestore.dataservices.nutanix.com/wordpress-rg-restore created

[nutanix@harbor ~]$ kubectl get applicationsnapshotrestore -n newapplication
NAME                   SNAPSHOT-NAME    COMPLETED
wordpress-rg-restore   wordpress-snap   false

[nutanix@harbor ~]$ kubectl get applicationsnapshotrestore -n newapplication
NAME                   SNAPSHOT-NAME    COMPLETED
wordpress-rg-restore   wordpress-snap   true

[nutanix@harbor ~]$ k get all -n newapplication
NAME                                   READY   STATUS    RESTARTS   AGE
pod/wordpress-84f858d9fd-8mjdp         1/1     Running   0          2m24s
pod/wordpress-mysql-556f6f65cc-bjd8q   1/1     Running   0          2m24s

NAME                      TYPE        CLUSTER-IP     EXTERNAL-IP   PORT(S)    AGE
service/wordpress         ClusterIP   10.99.164.74   <none>        80/TCP     2m24s
service/wordpress-mysql   ClusterIP   None           <none>        3306/TCP   2m24s

NAME                              READY   UP-TO-DATE   AVAILABLE   AGE
deployment.apps/wordpress         1/1     1            1           2m24s
deployment.apps/wordpress-mysql   1/1     1            1           2m24s

NAME                                         DESIRED   CURRENT   READY   AGE
replicaset.apps/wordpress-84f858d9fd         1         1         1       2m24s
replicaset.apps/wordpress-mysql-556f6f65cc   1         1         1       2m24s
- verify ndk intercom service is working on both source & target clusters:
cd ~/nkp-v2.15.0/cli
export SOURCE_NAME=<<NKP source cluster name>>
export TARGET_NAME=<<target cluster name>>
export APP_NAME=<<application name>>
export APP_NAMESPACE=<<application namespace>>
export KUBECONFIG=~/nkp-v2.15.0/cli/${SOURCE_NAME}.conf
kubectl get svc -n ntnx-system
--> load balancer service 'ndk-intercom-service' should exist and have an assigned external IP
kubectl get svc -n ntnx-system --kubeconfig ${TARGET_NAME}.conf
--> load balancer service 'ndk-intercom-service' should exist and have an assigned external IP
--> cache external IP (needed for the remote cr)
- verify an application snapshot exists and is ready:
kubectl get applicationsnapshot -n ${APP_NAMESPACE}
--> snapshot status for <<app name>>-snap should be "true"
- create remote custom resource:
~~~~~~~~~~~~~~~~~~~~~~~~~~~~~~~~~~~~~~~~~~~~~~~~~~~~~~~~~~~~~~~~~~~~~~~~~~~~
cat << EOF >  ndk-${TARGET_NAME}-remote.yaml
apiVersion: dataservices.nutanix.com/v1alpha1
kind: Remote
metadata:
  name: ndk-${TARGET_NAME}-remote
spec:
  clusterName: ${TARGET_NAME}
  ndkServiceIp: <<EXTERNAL IP of target cluster's 'ndk-intercom-service' LB service>>
  ndkServicePort: 2021
  tlsConfig:
    skipTLSVerify: true
EOF
~~~~~~~~~~~~~~~~~~~~~~~~~~~~~~~~~~~~~~~~~~~~~~~~~~~~~~~~~~~~~~~~~~~~~~~~~~~~
--> 'tlsConfig' section may not be needed or may need modified based on how NDK was installed, see following link: https://portal.nutanix.com/page/documents/details?targetId=Nutanix-Data-Services-for-Kubernetes-v1_2:top-remote-cr-create-cli-k8s.html
kubectl apply -f ndk-${TARGET_NAME}-remote.yaml
- verify remote cr is ready:
kubectl get remote
--> ndk-${TARGET_NAME}-remote should be listed and AVAILABLE status set to 'True'
ตัวอย่างการสร้าง Remote cluster
[nutanix@harbor ~]$ cat << EOF >  ndk-cluster2-remote.yaml
apiVersion: dataservices.nutanix.com/v1alpha1
kind: Remote
metadata:
  name: ndk-cluster2-remote
spec:
  clusterName: cluster2
  ndkServiceIp: 10.38.53.17
  ndkServicePort: 2021
  tlsConfig:
    skipTLSVerify: true
EOF
[nutanix@harbor ~]$ k apply -f ndk-cluster2-remote.yaml
remote.dataservices.nutanix.com/ndk-cluster2-remote created
[nutanix@harbor ~]$ k get remote
NAME                  ADDRESS       PORT   AVAILABLE
ndk-cluster2-remote   10.38.53.17   2021   True
cat << EOF >  ${APP_NAME}-replicate.yaml
apiVersion: dataservices.nutanix.com/v1alpha1
kind: ApplicationSnapshotReplication
metadata:
  name: ${APP_NAME}-replicate
  namespace: ${APP_NAMESPACE}
spec:
  applicationSnapshotName: ${APP_NAME}-snap
  replicationTargetName: ${TARGET_NAME}
EOF

~~~~~~~~~~~~~~~~~~~~~~~~~~~~~~~~~~~~~~~~~~~~~~~~~~~~~~~~~~~~~~~~~~~~~~~~~~~~
kubectl apply -f ${APP_NAME}-replicate.yaml
- monitor an application snapshot replication:
kubectl get applicationsnapshotreplication -n ${APP_NAMESPACE}
--> within a few minutes AVAILABLE status for <<app name>>-snap should be "True"
kubectl get applicationsnapshot -n ntnx-system ${APP_NAME}-snap --kubeconfig ${TARGET_NAME}.conf
--> should list snapshot on target cluster with a READY-TO-USE status of "true"
ตัวอย่างการสร้าง application snapshot replication
***NOTE: This enables application snapshots saved in one cluster to be restored to their original namespace on another cluster***
- verify the NDK reference grant CRD exists on the 'target' cluster:
cd ~/nkp-v2.15.0/cli
export TARGET_NAME=<<NKP target cluster name>>
export KUBECONFIG=~/nkp-v2.15.0/cli/${TARGET_NAME}.conf
kubectl get crd | grep 'referencegrants'
--> the 'referencegrants.gateway.networking.k8s.io' cred should be listed
- create a reference grant:
export APP_NAME=<<application name>>
export TGT_NAMESPACE=<<application's namespace on source cluster>>
***NOTE: target namespace must exist on target cluster (create if necessary)***
~~~~~~~~~~~~~~~~~~~~~~~~~~~~~~~~~~~~~~~~~~~~~~~~~~~~~~~~~~~~~~~~~~~~~~~~~~~~
cat << EOF >  ${APP_NAME}-snap-rg-${TARGET_NAME}.yaml
apiVersion: gateway.networking.k8s.io/v1beta1
kind: ReferenceGrant
metadata:
 name: ${APP_NAME}-snap-rg-${TARGET_NAME}
 namespace: ntnx-system
spec:
 from:
 - group: dataservices.nutanix.com
   kind: ApplicationSnapshotRestore
   namespace: ${TGT_NAMESPACE}
 to:
 - group: dataservices.nutanix.com
   kind: ApplicationSnapshot
   name: ${APP_NAME}-snap
EOF
ตัวอย่างการสร้าง application snapshot replication
[nutanix@harbor ~]$ cat << EOF >  wordpress-replicate.yaml
apiVersion: dataservices.nutanix.com/v1alpha1
kind: ApplicationSnapshotReplication
metadata:
  name: wordpress-replicate
  namespace: application
spec:
  applicationSnapshotName: wordpress-snap
  replicationTargetName: cluster2
EOF
[nutanix@harbor ~]$ k apply -f wordpress-replicate.yaml
applicationsnapshotreplication.dataservices.nutanix.com/wordpress-replicate created
[nutanix@harbor ~]$ k get applicationsnapshotreplication -A
NAMESPACE     NAME                  AVAILABLE   APPLICATIONSNAPSHOT   REPLICATIONTARGET   AGE
application   wordpress-replicate   False       wordpress-snap        cluster2            12s

[nutanix@harbor ~]$ k get applicationsnapshotreplication -A
NAMESPACE     NAME                  AVAILABLE   APPLICATIONSNAPSHOT   REPLICATIONTARGET   AGE
application   wordpress-replicate   True        wordpress-snap        cluster2            6m57s

[nutanix@harbor ~]$ kubectl get applicationsnapshot -n ntnx-system
NAME             AGE     READY-TO-USE   BOUND-SNAPSHOTCONTENT                                  SNAPSHOT-AGE
wordpress-snap   9m46s   true           asc-531ae7ca-7afb-40a6-a4f6-403c8e732cfa-1980ca1b120   6m58s
สร้าง reference grant สำหรับการ restore โดยต้องสร้างที่ cluster ปลายทาง
- create a reference grant:
export APP_NAME=<<application name>>
export TGT_NAMESPACE=<<application's namespace on source cluster>>
***NOTE: target namespace must exist on target cluster (create if necessary)***
~~~~~~~~~~~~~~~~~~~~~~~~~~~~~~~~~~~~~~~~~~~~~~~~~~~~~~~~~~~~~~~~~~~~~~~~~~~~
cat << EOF >  ${APP_NAME}-snap-rg-${TARGET_NAME}.yaml
apiVersion: gateway.networking.k8s.io/v1beta1
kind: ReferenceGrant
metadata:
 name: ${APP_NAME}-snap-rg-${TARGET_NAME}
 namespace: ntnx-system
spec:
 from:
 - group: dataservices.nutanix.com
   kind: ApplicationSnapshotRestore
   namespace: ${TGT_NAMESPACE}
 to:
 - group: dataservices.nutanix.com
   kind: ApplicationSnapshot
   name: ${APP_NAME}-snap
EOF

~~~~~~~~~~~~~~~~~~~~~~~~~~~~~~~~~~~~~~~~~~~~~~~~~~~~~~~~~~~~~~~~~~~~~~~~~~~~
kubectl apply -f ${APP_NAME}-snap-rg-${TARGET_NAME}.yaml
- verify reference grant exists:
kubectl get referencegrant -n ntnx-system
--> ${APP_NAME}-snap-rg-${TARGET_NAME} is in the list of reference grants
ตัวอย่างการสร้าง reference grant
[nutanix@harbor ~]$ cat << EOF >  wordpress-snap-rg-cluster2.yaml
apiVersion: gateway.networking.k8s.io/v1beta1
kind: ReferenceGrant
metadata:
 name: wordpress-snap-rg-cluster2
 namespace: ntnx-system
spec:
 from:
 - group: dataservices.nutanix.com
   kind: ApplicationSnapshotRestore
   namespace: application
 to:
 - group: dataservices.nutanix.com
   kind: ApplicationSnapshot
   name: wordpress-snap
EOF
[nutanix@harbor ~]$ k apply -f wordpress-snap-rg-cluster2.yaml
referencegrant.gateway.networking.k8s.io/wordpress-snap-rg-cluster2 created
[nutanix@harbor ~]$ k get referencegrant -A
NAMESPACE     NAME                         AGE
ntnx-system   wordpress-snap-rg-cluster2   9s
ทำการ restore application ที่ cluster ปลายทาง
cat << EOF >  ${APP_NAME}-rg-restore-${TARGET_NAME}.yaml
apiVersion: dataservices.nutanix.com/v1alpha1
kind: ApplicationSnapshotRestore
metadata:
  name: ${APP_NAME}-rg-restore-${TARGET_NAME}
  namespace: ${TGT_NAMESPACE}
spec:
  applicationSnapshotName: ${APP_NAME}-snap
  applicationSnapshotNamespace: ntnx-system
EOF

~~~~~~~~~~~~~~~~~~~~~~~~~~~~~~~~~~~~~~~~~~~~~~~~~~~~~~~~~~~~~~~~~~~~~~~~~~~~
kubectl apply -f ${APP_NAME}-rg-restore-${TARGET_NAME}.yaml
- verify restore operation completes successfully (can take a few minutes)
kubectl get applicationsnapshotrestore -n ${TGT_NAMESPACE}
--> ${APP_NAME}-rg-restore-${TARGET_NAME} shows a COMPLETED status of 'true'
- verify all artifacts referenced in snapshot describe operation have been restored on the target namespace:
***For example***
kubectl get all -n ${TGT_NAMESPACE}
kubectcl get pvc -n ${TGT_NAMESPACE}
ตัวอย่างการ restore application
[nutanix@harbor ~]$ cat << EOF >  wordpress-rg-restore-cluster2.yaml
apiVersion: dataservices.nutanix.com/v1alpha1
kind: ApplicationSnapshotRestore
metadata:
  name: wordpress-rg-restore-cluster2
  namespace: application
spec:
  applicationSnapshotName: wordpress-snap
  applicationSnapshotNamespace: ntnx-system
EOF
[nutanix@harbor ~]$ k apply -f wordpress-rg-restore-cluster2.yaml
applicationsnapshotrestore.dataservices.nutanix.com/wordpress-rg-restore-cluster2 created
[nutanix@harbor ~]$ k get applicationsnapshotrestore -A
NAMESPACE     NAME                            SNAPSHOT-NAME    COMPLETED
application   wordpress-rg-restore-cluster2   wordpress-snap   false

[nutanix@harbor ~]$ k get applicationsnapshotrestore -A
NAMESPACE     NAME                            SNAPSHOT-NAME    COMPLETED
application   wordpress-rg-restore-cluster2   wordpress-snap   true
[nutanix@harbor ~]$ k get pod -n application
NAME                               READY   STATUS    RESTARTS   AGE
wordpress-84f858d9fd-zqtrt         1/1     Running   0          78s
wordpress-mysql-556f6f65cc-s2h8m   1/1     Running   0          78s
[nutanix@harbor ~]$
Waiting for backup to complete. You may safely press ctrl-c to stop waiting - your backup will continue in the background.
...........
Backup completed with status: Completed. You may check for more information using the commands `velero backup describe wordpress-backup-1` and `velero backup logs wordpress-backup-1`.
Waiting for restore to complete. You may safely press ctrl-c to stop waiting - your restore will continue in the background.
..
Restore completed with status: Completed. You may check for more information using the commands `velero restore describe wordpress-restore-1` and `velero restore logs wordpress-restore-1`.