Category Archives: Kubernetes

Nutanix NKP Authentication With LDAP

เตรียม nkp service user โดยเข้าไปที่เมนู Active Directory Users and Computers

Click Users เลือก New และ User

ตั้งชื่อ ตัวอย่างนี้ใช้ nkpsvc

หลังจากสร้าง user ใหม่แล้วเก็บ DN ไว้สำหรับใช้ในการ setup ใน NKP โดย click ที่ user เลือก Advanced Feature

click ที่ nkpsvc และเลือก Properties

click เลือก Attribute Editor และ copy ค่า distinguishedName สำหรับใช้ในการ config ที่ nkp

เปิดหน้า nkp-dashboard และเข้าไปที่เมนู Identity Providers

click Add Identity Provider และเลือก LDAP จากนั้นเลือก Workspace ที่ต้องการจะให้ Identity Provider นี้ถูกนำไปใช้ เลือก All Workspace หมายถึง Identity Provider นี้จะถูกใช้กับทุกๆ Workspace

หาค่า User Search Base DN โดย click ที่ Users เลือก Properties

ไปที่ Attribute Editor แล้วเลื่อนหา distinguishedName และทำการ copy ค่านี้เพื่อใช้สำหรับ User Search Base DN

ค่า User Search Username โดย click ที่ user nkpsvc เลือก Properties ไปที่ Attribute Editor แล้วเลื่อนไปที่ sAMAccountName

นำค่าที่ได้กรอกใน User Search Base DN และ User Search Username

กรอกค่าอื่นๆ ตามตัวอย่าง

จากนั้นกด save เพื่อบันทึก

ทำการสร้าง group เพื่อ authentication เข้ามายัง nkp platform จากนั้นสร้าง user และ assign ให้เข้ามาเป็น member ของ group ที่สร้างขึ้น

จากนั้นสร้าง Groups โดยเข้าไปที่เมนู Identity Providers และ click Add Identity Provider

ตั้งชื่อ group name และ group โดยต้องขึ้นต้นด้วย oidc: ตามด้วย group name ที่สร้างใน ldap

เข้าไปที่เมนู Access Control เพื่อให้ group NKP Admins มีสิทธิ์​เป็น Platform Admin ของระบบ NKP ที่สามารถเข้าถึงและจัดการ NKP Management Cluster และ NKP workload clusters ที่อยู่ในะรบบ

เลือก Cluster Role Bindings เลือก Add Roles ที่ group NKP Admins จากนั้น assign role Cluster Admin Role และ dkp-kommander-admin

Log out จากระบบ หน้า Log in จะมี option ให้เลือก login ได้มากกว่าหนึ่งช่องทาง ทดสอบ login ด้วย LDAP โดยเลือกที่ Log in with ntnxlab.local.AD

ตัวอย่างการสร้าง Role อื่นๆ เช่น

Workspace Admin มีสิทธิ์ Adminstrator สำหรับ NKP Workload Cluster โดยสามารถเข้าถึง NKP UI และเข้าถึง workspace ที่ถูก assign ให้เข้าถึงเท่านั้น โดยจะต้อง assign role “Workspace Admin Role” และ “Kommander Workspace Admin Role”

Project Deployer ที่มีสิทธิ์อยู่ภายใต้ namespace ของ NKP workload cluster และเข้าถึง kubernetes dashboad ได้ซึ่งตรงกับความต้องการพื้นฐานของทีม DevOps โดยจะต้อง assign role “App Deployer”

โครงสร้างการสร้าง NKP, Workspace และ Project

Nutanix NKP Installation

ขั้นตอนการติดตั้ง NKP ระบบจะสร้าง kubernetes ชั่วคราวสำหรับการติดตั้งเฉพาะ (bootstrap cluster) โดยจะ load package ที่จำเป็นคือ cluster-api ทำงานใน kubernetes ชั่วคราว อยู่ภายใต้ package ที่ชื่อว่า convoy โดย cluster-api จะสร้าง nkp management cluster ที่ infra platform ปลายทางจากข้อมูลที่ได้จาก NKP cli

cluster-api เป็น controller ที่ทำงานบน kubernetes ทำ infra auto provisioning ไปยัง platform ต่างๆ เนื่องจากการ provision kubernetes บน platform ที่แตกต่างกันจะต้องอาศัย api ที่แตกต่างกัน การใช้ kubernetes api จึงเป็นวิธีการที่ทำให้ไม่ว่า platform อะไรก็สามารถเรียกใช้ได้ด้วย api เดียวกัน cluster-api จึงเป็น standard ในการสร้าง kubernetes บน platform ที่แตกต่างกันได้ โดยมี vendor จากค่ายต่างๆ เข้าร่วมพัฒนาการเชื่อมต่อไปยัง platform ตัวเองจำนวนมาก เช่น nutanix, vmware, aws, google, azure เป็นต้น ทำให้ทำการสร้าง kubernetes เป็นเรื่องง่าย โดยไม่ต้องพัฒนาส่วนการเชื่อมต่อกับ platform ปลายทางเอง เพียงแค่ระบุรูปแบบ kubernetes cluster (yaml) จากนั้น cluster-api จะสร้าง kubernetes บน platform ปลายทางให้

การติดตั้ง Nutanix NKP จะต้องเตรียม docker และ kubectl ที่เครื่อง jumphost หรือเครื่องที่จะใช้ในการติดตั้ง ตัวอย่างนี้จะเป็นการติดตั้งโดยไม่ access internet และใช้ Rocky Linux

ตรวจสอบ docker ที่เครื่องที่ใช้ในการติดตั้ง สามารถทำได้ตามขั้นตอน Harbor Container Registry Installation

[nutanix@harbor nkp]$ docker version
Client: Docker Engine - Community
 Version:           28.3.0
 API version:       1.51
 Go version:        go1.24.4
 Git commit:        38b7060
 Built:             Tue Jun 24 15:45:22 2025
 OS/Arch:           linux/amd64
 Context:           default

Server: Docker Engine - Community
 Engine:
  Version:          28.3.0
  API version:      1.51 (minimum version 1.24)
  Go version:       go1.24.4
  Git commit:       265f709
  Built:            Tue Jun 24 15:43:38 2025
  OS/Arch:          linux/amd64
  Experimental:     false
 containerd:
  Version:          1.7.27
  GitCommit:        05044ec0a9a75232cad458027ca83437aae3f4da
 runc:
  Version:          1.2.5
  GitCommit:        v1.2.5-0-g59923ef
 docker-init:
  Version:          0.19.0
  GitCommit:        de40ad0

การติดตั้งจำเป็นต้องมี Container Registry ที่มี package bundle ของ nkp ขั้นตอนนี้ทำการทดสอบ login จากเครื่องที่ใช้ในการติดตั้ง

[nutanix@harbor nkp]$ docker login 10.38.252.79
Username: admin
Password:

WARNING! Your credentials are stored unencrypted in '/home/nutanix/.docker/config.json'.
Configure a credential helper to remove this warning. See
https://docs.docker.com/go/credential-store/

Login Succeeded

ติดตั้ง kubectl สำหรับเข้าถึง kubernetes

[nutanix@harbor nkp-v2.17.0]$ sudo curl -Lo /usr/local/bin/kubectl https://storage.googleapis.com/kubernetes-release/release/$(curl -s https://storage.googleapis.com/kubernetes-release/release/stable.txt)/bin/linux/amd64/kubectl
  % Total    % Received % Xferd  Average Speed   Time    Time     Time  Current
                                 Dload  Upload   Total   Spent    Left  Speed
100 53.7M  100 53.7M    0     0  74.2M      0 --:--:-- --:--:-- --:--:-- 74.3M
[nutanix@harbor nkp-v2.17.0]$ sudo chmod +x /usr/local/bin/kubectl

ติดตั้ง nkp cliโดย copy Download Link จาก nutanix portal จากหน้า download software

ขั้นตอนการติดตั้ง nkp cli

curl -fsSL https://raw.githubusercontent.com/nutanixdev/nkp-quickstart/main/get-nkp-cli | bash

#When prompted, enter the copy Downloadd Link

[nutanix@harbor ~]$ curl -fsSL https://raw.githubusercontent.com/nutanixdev/nkp-quickstart/main/get-nkp-cli | bash
open browser to site : https://portal.nutanix.com/page/downloads?product=nkp and find "NKP for Linux"
Enter 'NKP for Linux' download link: https://download.nutanix.com/downloads/nkp/v2.17.0/nkp_v2.17.0_linux_amd64.tar.gz?Expires=1768401776&Key-Pair-Id=APKAJTTNCWPEI42QKMSA&Signature=SiSx9R9vPquHatjI8NMUWCavIS1y~xYrzQHIIGd~ZBsphTBVk6HmB--Yqc82lPe2T5hUlBhFG~~jD75nNRYECvpKhumxqzZM9~WzqIDPxo16NDSX9eLokqe9dL9Oe8LBEDz-tC6BdMb0iOLv3nnxO-4sxyXg8pM0BHsvEat305nNAuZTQpO0d9DHxE2pF69FxCHxJ0KOebNOgArYiS63bl2tQHVAe0iWYtkLkm6rBvVNRlFSQokjCVw5u1aBoxpKSOMp4RAGo5iNHHf3hlwLL25yK7LI~glLKhMOD2KJ55Kkyc4pqfV053oHtmJurnGHkb87T36-7E1N3lNbx2AoAg__
NKP CLI installed successfully!
checking version
catalog: v0.8.1
diagnose: v0.12.0
imagebuilder: v2.17.0
kommander: v2.17.0
konvoy: v2.17.0
konvoybundlepusher: v2.17.0
mindthegap: v1.24.0
nkp: v2.17.0

Download NKP Airgapped Bundle สำหรับการติดตั้ง โดยการ copy Download Link จากหน้า nutanix portal

ขั้นตอนการ Download ผ่าน curl cli

[nutanix@harbor ~]$ curl -o nkp-air-gapped-bundle_v2.17.0_linux_amd64.tar.gz "https://download.nutanix.com/downloads/nkp/v2.17.0/nkp-air-gapped-bundle_v2.17.0_linux_amd64.tar.gz?Expires=1768402002&Key-Pair-Id=APKAJTTNCWPEI42QKMSA&Signature=DINg8wm1mGZR8fgXilavLmDe81UR126bHPdhLddcLuz8BQrXOPWSzHW29kVrNNUXP~CMS-cLArguoPGDwljnmBDaFACTsA9n~ooyA~Ff~9TEyjHiaWaNjez9gVawoyvHszti7Mfad7Bj4btFIsK9xGVYhJSuWAOryx2ieltb3GOEKrjjgZY4ykw7i3EzZrd9hXRga0DjbE3Lfy-YX~2h0~uhH~XiF08tvOI~LfTMi7AZDt2hJyZYgcXPqeVDJuFjureFdb4J4NNRu-lwbbrqipAQoMIYIOwUPLdV0oRFad4MAOUqqMhZIikSQSoYznkLb5WiFeVGxaagjcPFjflS1w__"
  % Total    % Received % Xferd  Average Speed   Time    Time     Time  Current
                                 Dload  Upload   Total   Spent    Left  Speed
100 20.8G  100 20.8G    0     0   135M      0  0:02:37  0:02:37 --:--:--  139M

ทำการ unzip file nkp-air-gapped-bunndle และทำการ load docker image เข้าไปยังระบบ docker ของเครื่อง จากนั้นทำการ upload image ไปยัง docker registry ที่เตรียมไว้ด้วย nkp cli

[nutanix@harbor ~]$ tar -xvf nkp-air-gapped-bundle_v2.17.0_linux_amd64.tar.gz

[nutanix@harbor nkp]$ cd nkp-v2.17.0/
[nutanix@harbor nkp-v2.17.0]$ docker load -i konvoy-bootstrap-image-v2.17.0.tar

[nutanix@harbor nkp-v2.17.0]$ docker image ls | grep konvoy-bootstrap
WARNING: This output is designed for human readability. For machine-readable output, please use --format.
mesosphere/konvoy-bootstrap:v2.17.0     9f13ef224cd1       5.86GB         2.92GB

[nutanix@harbor nkp-v2.17.0]$ nkp push bundle --bundle ./container-images/konvoy-image-bundle-v2.17.0.tar --to-registry=10.38.252.79/nkp --to-registry-username=admin --to-registry-password=Harbor12345 --to-registry-insecure-skip-tls-verify

[nutanix@harbor nkp-v2.17.0]$ nkp push bundle --bundle ./container-images/kommander-image-bundle-v2.17.0.tar --to-registry=10.38.252.79/nkp --to-registry-username=admin --to-registry-password=Harbor12345 --to-registry-insecure-skip-tls-verify

สร้าง ssh key สำหรับ access VM ที่สร้างขึ้นโดยระบบ

[nutanix@harbor ~]$ ssh-keygen -t ed25519
Generating public/private ed25519 key pair.
Enter file in which to save the key (/home/nutanix/.ssh/id_ed25519):
Enter passphrase (empty for no passphrase):
Enter same passphrase again:
Your identification has been saved in /home/nutanix/.ssh/id_ed25519
Your public key has been saved in /home/nutanix/.ssh/id_ed25519.pub
The key fingerprint is:
SHA256://XGZ4k3rrFq2BC+QWmPk3NJNt972vQ5vHrnSuOyTm0 nutanix@harbor.local
The key's randomart image is:
+--[ED25519 256]--+
|                 |
|                 |
|          .      |
|         = +     |
|        S B + .  |
|         X + o . |
|          @ ..E.+|
|         o =.*o&X|
|          .o=*XX%|
+----[SHA256]-----+

ตัวอย่างนี้ใช้ ed25519 สำหรับการสร้าง key ซึ่งมีข้อดีดังนี้

Ed25519 offers several key advantages over RSA:

Performance: Ed25519 is significantly faster for both signing and verification operations. It uses elliptic curve cryptography which requires less computational overhead than RSA’s integer factorization approach.

Key size: Ed25519 uses 256-bit keys that provide security equivalent to 3072-bit RSA keys. This means much smaller key sizes for the same security level, reducing storage and transmission overhead.

Security design: Ed25519 was designed from the ground up to avoid many implementation pitfalls that have plagued RSA. It’s resistant to timing attacks, doesn’t require careful random number generation during signing (unlike RSA), and uses deterministic signatures.

Simplicity: The algorithm has fewer parameters and configuration options, reducing the chance of implementation errors. RSA requires choosing padding schemes, key sizes, and other parameters that can introduce vulnerabilities if done incorrectly.

Side-channel resistance: Ed25519 is designed to be resistant to side-channel attacks like timing and power analysis attacks, whereas RSA implementations often leak information through timing variations.

Future-proofing: While both are considered secure today, Ed25519’s elliptic curve foundation generally scales better as security requirements increase over time.

The main trade-off is that RSA is more widely supported in legacy systems, but for new applications, Ed25519 is generally the better choice due to its superior performance and security characteristics.

ติดตั้ง NKP ด้วย cli โดยจะต้อง export user และ password variable ก่อนจะ run nkp command

[nutanix@harbor nkp-v2.14.0]$ export NUTANIX_USER="admin"
export NUTANIX_PASSWORD='nx2Tech581!'

[nutanix@harbor ~]$ nkp create cluster nutanix --cluster-name nkp-mgmt \
--control-plane-prism-element-cluster PHX-POC252 \
--worker-prism-element-cluster PHX-POC252 \
--control-plane-subnets primary-PHX-POC252 \
--worker-subnets primary-PHX-POC252 \
--control-plane-endpoint-ip 10.38.252.10 \
--csi-storage-container default \
--endpoint https://10.38.252.7:9440 \
--control-plane-vm-image nkp-rocky-9.6-release-cis-1.34.1-20251206060914.qcow2 \
--worker-vm-image nkp-rocky-9.6-release-cis-1.34.1-20251206060914.qcow2 \
--kubernetes-service-load-balancer-ip-range 10.38.252.11-10.38.252.13 \
--registry-mirror-url https://10.38.252.79/nkp \
--registry-mirror-username admin \
--registry-mirror-password Harbor12345 \
--registry-mirror-cacert /home/nutanix/harbor/certs/harbor.local.crt \
--ssh-public-key-file /home/nutanix/id_ed25519.pub \
--ssh-username nutanix \
--airgapped \
--insecure \
--verbose 5 \
--timeout 0 \
--self-managed

กรณี airgap ต้องระบุ registry mirror เพื่อใช้ในการติดตั้ง ตามขั้นตอน upload konvoy และ kommander image ในขั้นตอนก่อนหน้า

ข้อมูล harbor.crt ได้มาจากขั้นตอนการสร้าง harbor หรือ สามารถ export ได้ด้วย cli

openssl s_client -connect 10.38.252.79:443 -showcerts </dev/null 2>/dev/null | openssl x509 -outform PEM > /home/nutanix/harbor.crt

กรณีที่การติดตั้งสามารถ access internet ได้ไม่จำเป็นต้องใช้ option –airgapped และระบบจะทำการติดตั้งโดยใช้ค่า default ถ้าไม่ระบุใน cli เช่น ขนาดของ VM และจำนวน VM เช่น Control plane จำนวน 3 VMs และ Worker จำนวน 4 VMs ดังตัวอย่าง options อื่นๆ ดังนี้

𝗘𝗡𝗩𝗜𝗥𝗢𝗡𝗠𝗘𝗡𝗧 𝗩𝗔𝗥𝗜𝗔𝗕𝗟𝗘𝗦
export CLUSTER_NAME="wskn-mgmt-ag" # Name of the Kubernetes cluster
export NUTANIX_PC_FQDN_ENDPOINT_WITH_PORT="https://10.168.100.4:9440" # Nutanix Prism Central endpoint URL with port
export CONTROL_PLANE_IP="10.168.102.30" # IP address for the Kubernetes control plane
export IMAGE_NAME="nkp-rocky-9.4-release-1.29.6-20240816215147" # Name of the VM image to use for cluster nodes
export PRISM_ELEMENT_CLUSTER_NAME="wskn-nongpu" # Name of the Nutanix Prism Element cluster
export SUBNET_NAME="non-gpu-airgap" # Name of the subnet to use for cluster nodes
export PROJECT_NAME="default" # Name of the Nutanix project
export CONTROL_PLANE_REPLICAS="3" # Number of control plane replicas
export CONTROL_PLANE_VCPUS="4" # Number of vCPUs for control plane nodes
export CONTROL_PLANE_CORES_PER_VCPU="1" # Number of cores per vCPU for control plane nodes
export CONTROL_PLANE_MEMORY_GIB="16" # Memory in GiB for control plane nodes
export WORKER_REPLICAS="3" # Number of worker node replicas
export WORKER_VCPUS="8" # Number of vCPUs for worker nodes
export WORKER_CORES_PER_VCPU="1" # Number of cores per vCPU for worker nodes
export WORKER_MEMORY_GIB="32" # Memory in GiB for worker nodes
export NUTANIX_STORAGE_CONTAINER_NAME="default-container-xxx" # Name of the Nutanix storage container
export CSI_FILESYSTEM="ext4" # Filesystem type for CSI volumes
export CSI_HYPERVISOR_ATTACHED="true" # Whether to use hypervisor-attached volumes for CSI
export LB_IP_RANGE="10.168.102.31-10.168.102.31" # IP range for load balancer services
export SSH_KEY_FILE="/root/.ssh/id_rsa.pub" # Path to the SSH public key file
export NUTANIX_USER="admin" # Nutanix PrismCentral username (left blank for security)
export NUTANIX_PASSWORD="" # Nutanix PrismCentral password (left blank for security)
export REGISTRY_URL="https://registry.wskn-ag.local/library" # URL for the private container registry
export REGISTRY_USERNAME="admin" # Username for authenticating with the private registry (left blank for security)
export REGISTRY_PASSWORD="" # Password for authenticating with the private registry (left blank for security)
export REGISTRY_CA="/root/wskn-ag-certs/server.crt" # Path to the CA certificate for the private registry

𝗜𝗡𝗦𝗧𝗔𝗟𝗟𝗔𝗧𝗜𝗢𝗡 𝗖𝗢𝗠𝗠𝗔𝗡𝗗
nkp create cluster nutanix --cluster-name $CLUSTER_NAME \
    --endpoint $NUTANIX_PC_FQDN_ENDPOINT_WITH_PORT\
    --control-plane-endpoint-ip $CONTROL_PLANE_IP \
    --control-plane-vm-image $IMAGE_NAME \
    --control-plane-prism-element-cluster $PRISM_ELEMENT_CLUSTER_NAME \
    --control-plane-subnets $SUBNET_NAME \
    --control-plane-pc-project $PROJECT_NAME \
    --control-plane-replicas $CONTROL_PLANE_REPLICAS \
    --control-plane-vcpus $CONTROL_PLANE_VCPUS \
    --control-plane-cores-per-vcpu $CONTROL_PLANE_CORES_PER_VCPU \
    --control-plane-memory $CONTROL_PLANE_MEMORY_GIB \
    --worker-vm-image $IMAGE_NAME \
    --worker-prism-element-cluster $PRISM_ELEMENT_CLUSTER_NAME \
    --worker-subnets $SUBNET_NAME \
    --worker-pc-project $PROJECT_NAME \
    --worker-replicas $WORKER_REPLICAS \
    --worker-vcpus $WORKER_VCPUS \
    --worker-cores-per-vcpu $WORKER_CORES_PER_VCPU \
    --worker-memory $WORKER_MEMORY_GIB \
    --ssh-public-key-file $SSH_KEY_FILE \
    --csi-storage-container $NUTANIX_STORAGE_CONTAINER_NAME \
    --csi-file-system $CSI_FILESYSTEM \
    --csi-hypervisor-attached-volumes=$CSI_HYPERVISOR_ATTACHED \
    --kubernetes-service-load-balancer-ip-range $LB_IP_RANGE \
    --insecure \
    --self-managed \
    --airgapped \
    --registry-mirror-url $REGISTRY_URL \
    --registry-mirror-cacert $REGISTRY_CA \
    --registry-mirror-username=$REGISTRY_USERNAME \
    --registry-mirror-password=$REGISTRY_PASSWORD

หลังจาก nkp cli ทำงาน ระบบจะสร้าง kubernetes ชั่วคราวโดยใช้ KIND (kubernetes in docker) โดย load package ที่ได้จาก konvoy-bootstrap-image ระบบจะสร้าง kubeconfig ตาม format ชื่อ cluster สามารถใช้ access KIND cluster เพื่อตรวจสอบสถานะการทำงานได้ดังนี้

[nutanix@harbor nkp-v2.17.0]$ export KUBECONFIG=nkp-mgmt-bootstrap.conf

ทำการ list logs ระหว่างการติดตั้งได้จาก container capx-controller-manager สำหรับ nutanix platform สำหรับ platform อื่นๆ สังเกตุจาก digit ที่ 4 คือ x = nutanix, a=aws, g=google, pp = preprovision, v=vmware, vcd=vmware cloud director, z=azure

[nutanix@harbor nkp-v2.17.0]$ kubectl logs -f capx-controller-manager-745948468d-dkjf5 -n capx-system

ตรวจสอบว่ามี container อะไรบ้างที่ถูกใช้ในการติดตั้ง

[nutanix@harbor nkp-v2.17.0]$ kubectl get pods -A -o yaml | grep image: | sort -h | uniq

รอจนกว่าระบบจะติดตั้งสมบูรณ์ โดยขั้นตอนการติดตั้งระบบจะลบ KIND และย้าย configuration ไปยัง cluster ปลายทาง โดยจะสร้าง kubeconfig ไว้ให้เพื่อ access ไปยัง cluster ที่สร้างขึ้นใหม่ ใช้เวลาประมาณ 10-20 นาที

Cluster default/nkp-mgmt kubeconfig was written to to the filesystem.
You can now view resources in the new cluster by using the --kubeconfig flag with kubectl.
For example: kubectl --kubeconfig="/home/nutanix/nkp-mgmt.conf" get nodes

Starting Kommander installation
 ✓ Deploying Flux
 ✓ Deploying Ingress certificate
 ✓ Creating kommander-overrides ConfigMap
 ✓ Deploying Git Operator
 ✓ Creating GitClaim for management GitRepository
 ✓ Creating GitClaimUser for accessing management GitRepository
 ✓ Deploying Flux configuration
 ✓ Deploying Kommander Operator
 ✓ Creating KommanderCore resource
 ✓ Cleaning up Kommander bootstrap resources
 ✓ Deploying Gatekeeper
 ✓ Creating PlatformVersionArtifact
 ✓ Deploying Kommander AppManagement
 ✓ 4 out of 14 core applications have been installed (waiting for dex, dex-k8s-authenticator and 8 more)
 ✓ 5 out of 14 core applications have been installed (waiting for dex, dex-k8s-authenticator and 7 more)
 ✓ 10 out of 14 core applications have been installed (waiting for dex-k8s-authenticator, kommander and 2 more)
 ✓ 11 out of 14 core applications have been installed (waiting for dex-k8s-authenticator, kommander-ui and 1 more)
 ✓ 13 out of 14 core applications have been installed (waiting for traefik-forward-auth-mgmt)

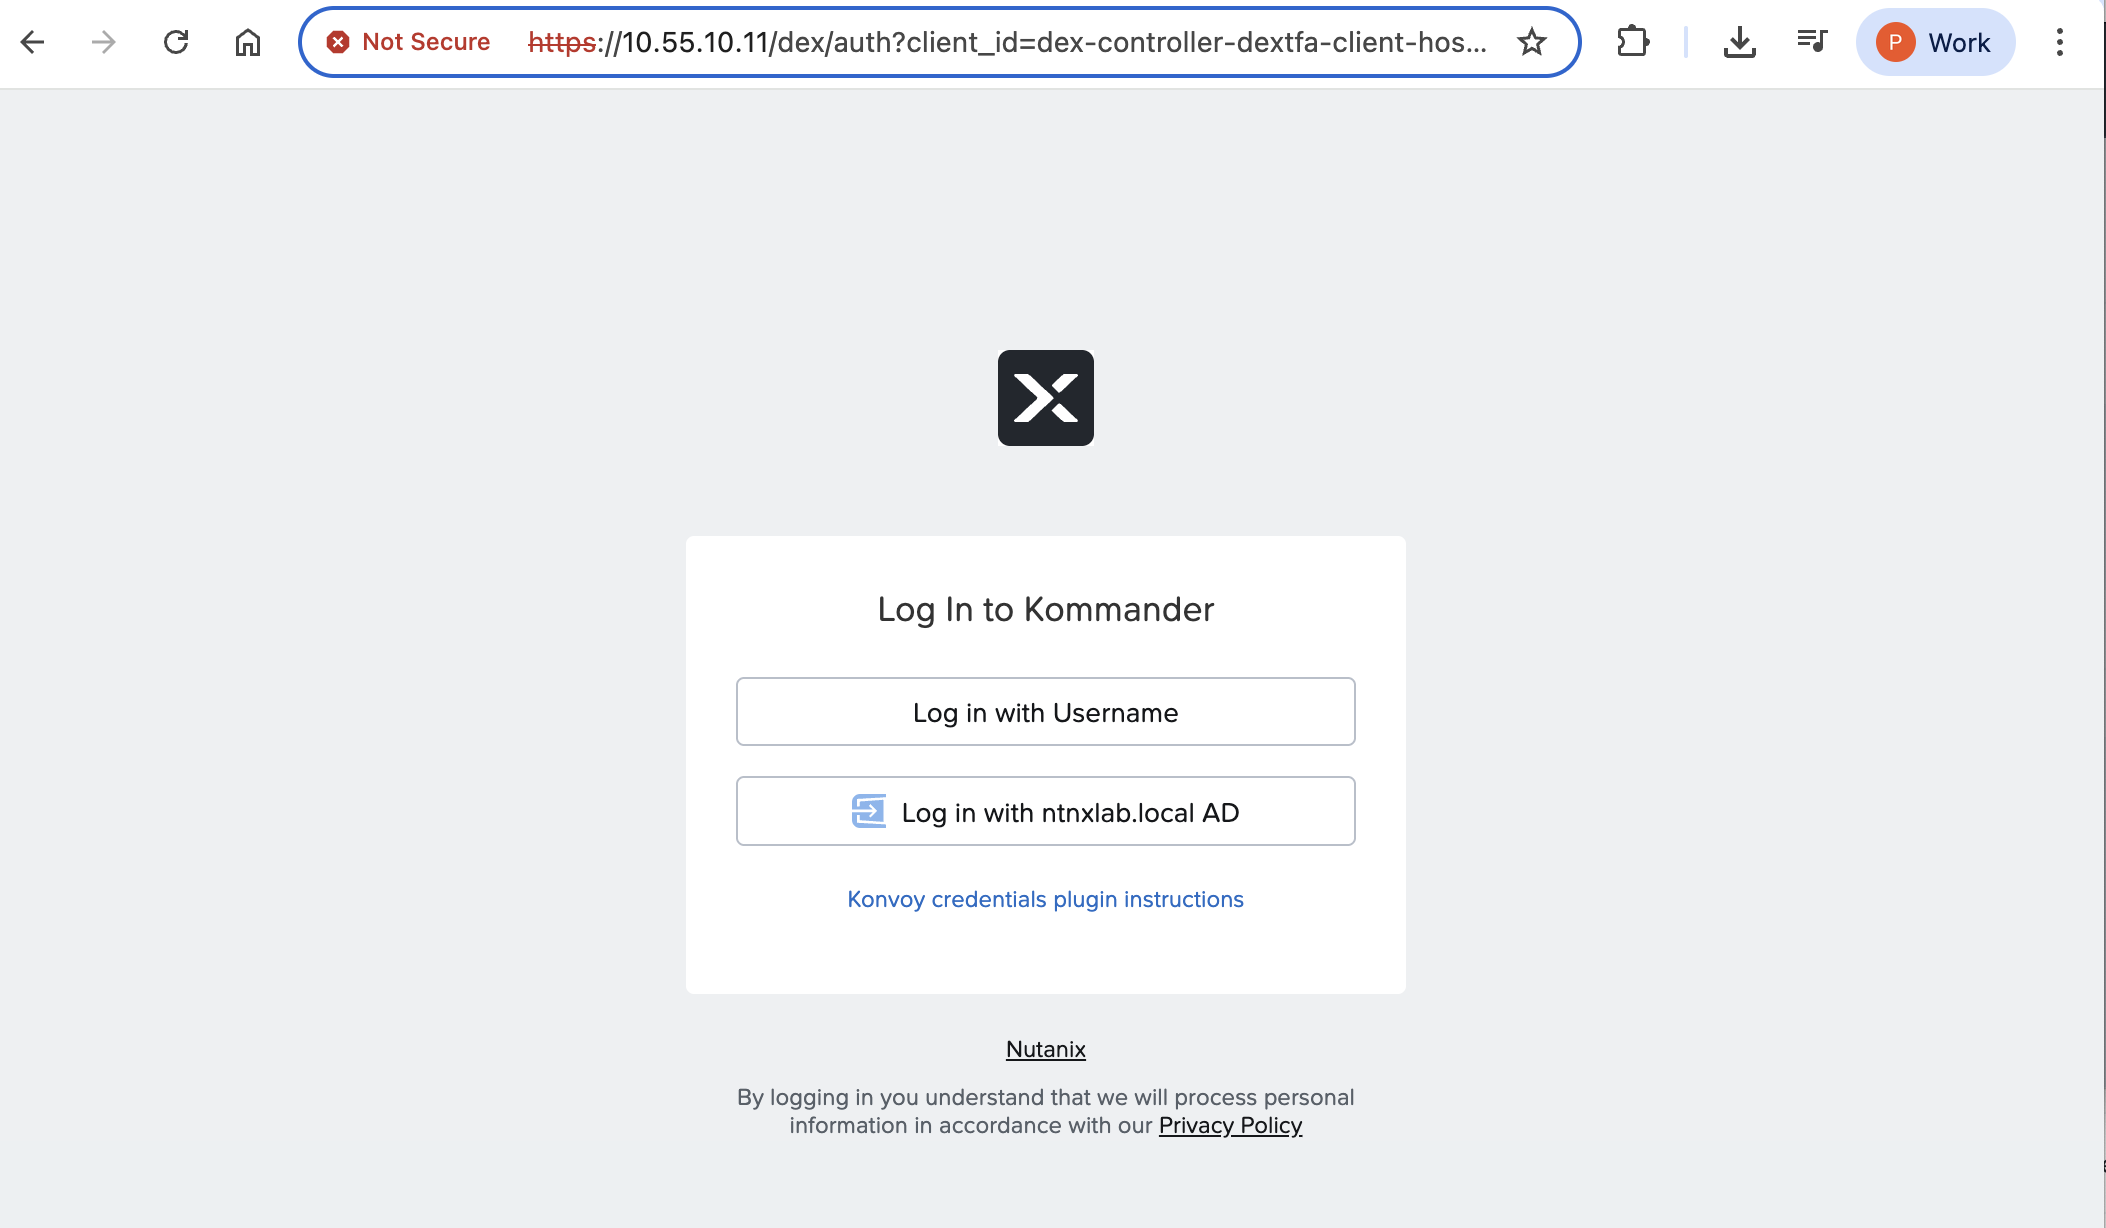
Cluster was created successfully! Get the dashboard details with:
nkp get dashboard --kubeconfig="/home/nutanix/nkp-mgmt.conf"

login ไปยัง nkp management platform โดยใช้ nkp cli เพื่อ generate user และ password รวมถึง dashboard url

[nutanix@harbor ~]$ nkp get dashboard --kubeconfig="/home/nutanix/nkp-mgmt.conf"
Username: compassionate_hellman
Password: CJey2OWLtc5nXwFXhDfDWC7tPsJlPu5gNiS2tKLl93J7avxCGvxYqKaPZ3zs3HJQ
URL: https://10.38.252.11/dkp/kommander/dashboard

Access dashboard ตามข้อมูลที่ได้

Harbor Container Registry Installation

Harbor เป็น container registry ที่ได้รับความนิยมมากในปัจจุบัน เนื่องจากมีความสามารถที่ช่วยให้เก็บ container image ไว้ภายในองค์กรแล้วยังมีความสามารถอื่นๆ เช่น การทำ proxy ไปยัง container registry ภายนอกเช่น docker hub เพื่อลดจำนวน request ไม่ให้ติดปัญหา request limit ของ docker hub การทำ replication ระหว่าง Harbor ด้วยกันกรณี DC/DR use case และ integrate กับ container scanning เช่น Trivy, Clair และ Notary สำหรับการทำ image signed เพื่อป้องกันการแก้ไขเปลี่ยนแปลง image

ในการติดตั้ง Harbor ต้องการ Docker และ Docker Compose ขั้นตอนการ install docker ขึ้นอยู่กับ OS โดยตัวอย่างนี้ติดตั้งบน Linux Rocky

#!/bin/bash
# Docker Installation Script for Rocky Linux
# 1. Update system packages
sudo dnf update -y
# 2. Install required packages
sudo dnf install -y dnf-utils device-mapper-persistent-data lvm2
# 3. Add Docker's official repository
sudo dnf config-manager --add-repo https://download.docker.com/linux/centos/docker-ce.repo
# 4. Install Docker Engine
sudo dnf install -y docker-ce docker-ce-cli containerd.io docker-buildx-plugin docker-compose-plugin
# 5. Start and enable Docker service
sudo systemctl start docker
sudo systemctl enable docker
# 6. Add current user to docker group (to run docker without sudo)
sudo groupadd docker
sudo usermod -aG docker $USER
sudo newgrp docker
# 7. Verify Docker installation
sudo docker --version
sudo docker run hello-world
# 8. Check Docker service status
sudo systemctl status docker
# 9. Optional: Install Docker Compose (if not using plugin version)
# sudo curl -L "https://github.com/docker/compose/releases/latest/download/docker-compose-$(uname -s)-$(uname -m)" -o /usr/local/bin/docker-compose
# sudo chmod +x /usr/local/bin/docker-compose
echo "Docker installation completed!"
echo "Please log out and log back in for group changes to take effect."
echo "Then you can run 'docker ps' without sudo."

กรณีที่ enable firewall จะต้องทำการ allow service docker ด้วย

# Open Docker ports if firewall is enabled
sudo firewall-cmd --permanent --add-service=docker
sudo firewall-cmd --reload

ทำการ download harbor installation binary และสร้างไฟล์ที่เกี่ยวข้อง

[nutanix@harbor harbor]$ HARBOR_VERSION=$(curl -s https://api.github.com/repos/goharbor/harbor/releases/latest | grep 'tag_name' | cut -d\" -f4)
[nutanix@harbor harbor]$ echo $HARBOR_VERSION
v2.13.1
[nutanix@harbor harbor]$ wget "https://github.com/goharbor/harbor/releases/download/${HARBOR_VERSION}/harbor-offline-installer-${HARBOR_VERSION}.tgz"
[nutanix@harbor harbor]$ tar xvf harbor-offline-installer-${HARBOR_VERSION}.tgz
[nutanix@harbor harbor]$ cd harbor
[nutanix@harbor harbor]$ cp harbor.yml.tmpl harbor.yml
[nutanix@harbor harbor]$ mkdir certs
[nutanix@harbor harbor]$ mkdir data
[nutanix@harbor harbor]$ mkdir generate-cert

ทำการ generate certificate สำหรับ Harbor ตัวอย่างนี้จะตั้ง host name เป็น harbor.local โดยเป็น self-signed certificate


# Generate CA Key
[nutanix@harbor harbor]$ cd generate-cert

# 1. Generate CA (Root Authority)
[nutanix@harbor generate-cert]$ openssl genrsa -out ca.key 4096

[nutanix@harbor generate-cert]$  openssl req -x509 -new -nodes -sha512 -days 3650 \
-subj "/C=TH/ST=BKK/L=BKK/O=ntnxlab/OU=demo/CN=ntnxlab-Internal-CA Root CA" \
-key ca.key -out ca.crt

# 2. Generate Server Key
[nutanix@harbor generate-cert]$  openssl genrsa -out harbor.local.key 2048

# 3. Generate CSR (Certificate Signing Request)
# Use the actual address you will type into your browser/CLI as the CN
[nutanix@harbor generate-cert]$  openssl req -sha512 -new \
-subj "/C=TH/ST=BKK/L=BKK/O=ntnxlab/OU=demo/CN=ntnxlab.local" \
-key harbor.local.key -out harbor.local.csr

# 4. Create v3.ext (Crucial fix: CA:FALSE and proper SAN)
[nutanix@harbor generate-cert]$  cat > v3.ext <<-EOF
authorityKeyIdentifier=keyid,issuer
basicConstraints=CA:FALSE
keyUsage = digitalSignature, nonRepudiation, keyEncipherment, dataEncipherment
extendedKeyUsage = serverAuth
subjectAltName = @alt_names

[alt_names]
DNS.1=ntnxlab.local
DNS.2=*.ntnxlab.local
DNS.3=harbor.ntnxlab.local
IP.1=10.38.252.79  # REPLACE with your actual Harbor VM IP
EOF

# 5. Generate Server Certificate (Signed by the CA)
[nutanix@harbor generate-cert]$  openssl x509 -req -sha512 -days 3650 \
-extfile v3.ext \
-CA ca.crt -CAkey ca.key -CAcreateserial \
-in harbor.local.csr \
-out harbor.local.crt

# verify new CA, expect correct subject output
[nutanix@harbor generate-cert]$  openssl x509 -in ca.crt -nameopt sep_multiline -subject -noout

# verify new CA, Should return OK
[nutanix@harbor generate-cert]$ openssl verify -CAfile ca.crt harbor.local.crt

# verify new CA, Should show your DNS and IP
[nutanix@harbor generate-cert]$ openssl x509 -in harbor.local.crt -text -noout | grep -A 1 "Subject Alternative Name"

To make your Kubernetes nodes or Docker clients trust this certificate, 
you must copy the ca.crt (not the harbor.local.crt) to the OS trust store:
RHEL/CentOS: Copy to /etc/pki/ca-trust/source/anchors/ and run update-ca-trust.
Ubuntu/Debian: Copy to /usr/local/share/ca-certificates/ and run update-ca-certificates.

Docker specific: Docker also requires the certs in
/etc/docker/certs.d/harbor.ntnxlab.local/ca.crt

# Optional - Convert the certificate to PEM format for docker
[nutanix@harbor generate-cert]$ openssl x509 -inform PEM -in harbor.local.crt -out harbor.local.cert

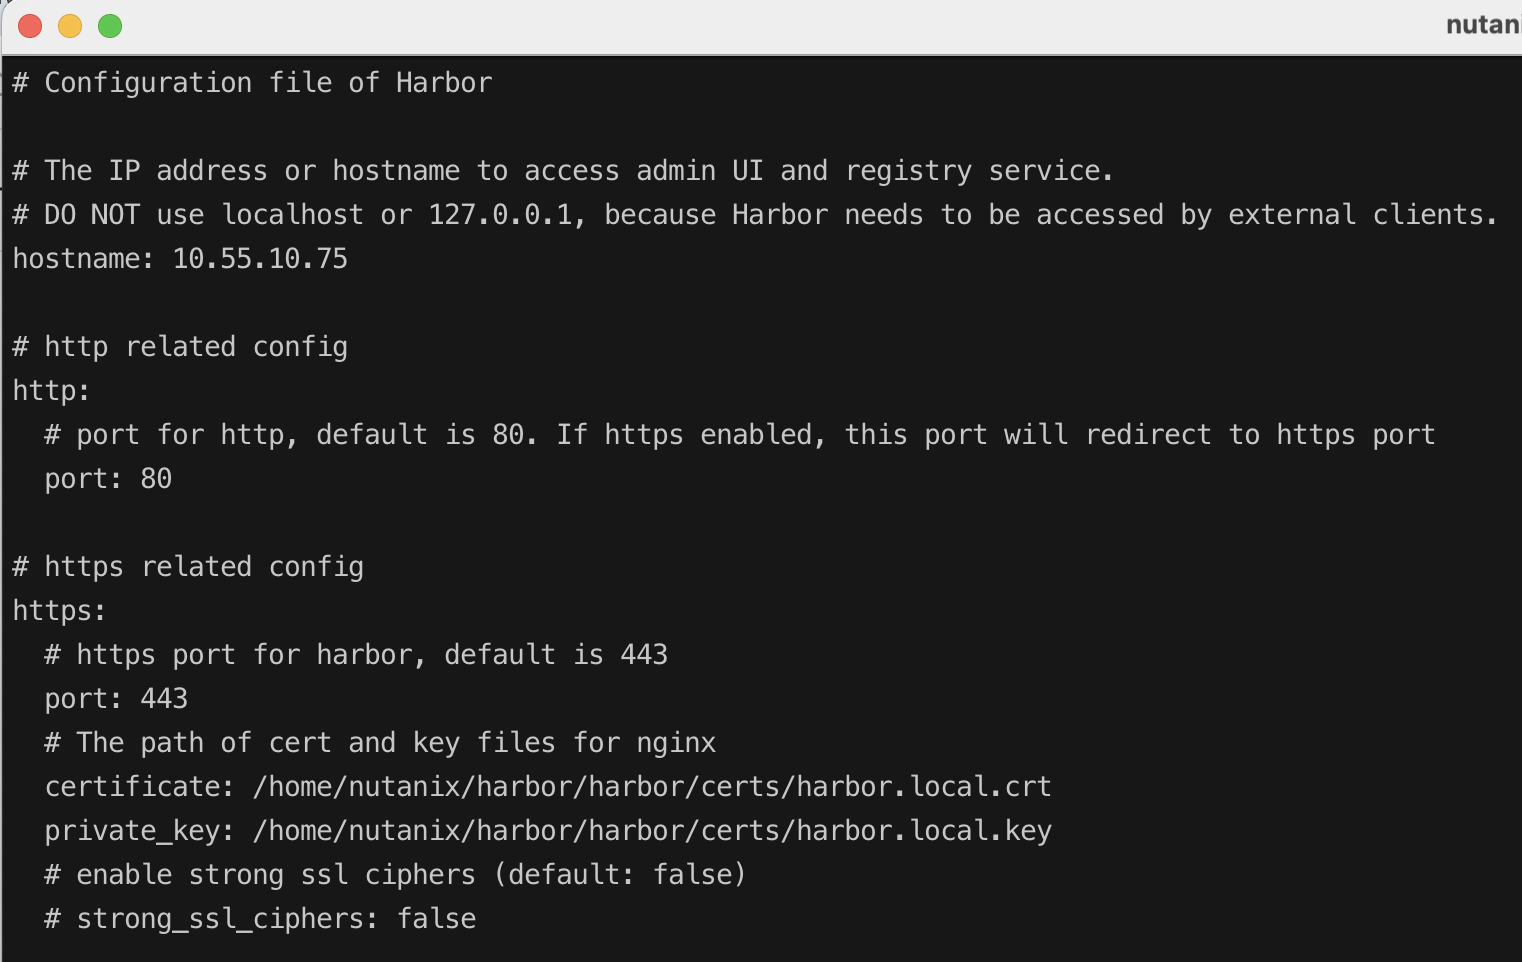
#copy harbor.local.crt and harbor.local.key for harbor server
[nutanix@harbor generate-cert]$ cp harbor.local.crt ../certs
[nutanix@harbor generate-cert]$ cp harbor.local.key ../certs

แก้ไขไฟล์ harbor.yml โดยมีค่าที่จำเป็นต้องแก้ดังนี้

hostname:
certificate:
private_keys:
data_volume:

hostname เป็น domain name ที่ map ไว้ที่ DNS server แต่ถ้าไม่มี DNS server สามารถใช้ IP แทนได้ดังตัวอย่างนี้

Certificate และ private_keys ได้จากขึ้นตอนสร้าง certificate ข้างต้น

data_volume คือข้อมูลระบบและ docker image ที่จัดเก็บใน harbor จำเป็นในการ backup กรณีระบบมีปัญหา และต้องการ recover

run install command เพื่อติดตั้ง harbor ทั้งนี้สามารถติดตั้ง components อื่นๆ ร่วมด้วยโดยใช้ options –with-trivy –with-notary –with-clair –with-chartmuseum

trivy และ clair สำหรับ vulnerability scanner และ notary สำหรับ container signing และ chartmuseum เพื่อให้ harbor สามารถเก็บ helm chart ได้ ตัวอย่างนี้จะติดตั้งเฉพาะ harbor

[nutanix@harbor harbor]$ sudo ./install.sh

หลังจากติดตั้งเสร็จ ทดสอบ login

[nutanix@harbor harbor]$ docker login 10.55.10.75
Username: admin
Password:
WARNING! Your credentials are stored unencrypted in '/home/nutanix/.docker/config.json'.
Configure a credential helper to remove this warning. See
https://docs.docker.com/go/credential-store/
Login Succeeded

กรณีที่ต้องการทำ registry proxy จะต้องไปสร้าง enpoint ที่ต้องการ connect ก่อน โดยเข้าไปที่เมนู Registries และ click +NEW ENDPOINT

กรณีนี้เลือก Docker Hub จากนั้นกรอกข้อมูล Access ID และ Access Secret เพื่อ connect ไปยัง Docker hub โดยต้องไปสร้าง access token ที่ Docker Hub ก่อน สามารถทำทดสอบการเชื่อมต่อโดย click TEST CONNECTION กด OK เพื่อเพิ่ม Endpoint

สร้าง Projects โดยเข้าไปที่เมนู Projects และ click + NEW PROJECT

กรอกข้อมูล Project name เลือก Access Level เลือก Proxy Cache และเลือก endpoint ที่สร้างในขั้นต้น และ click OK เพื่อสร้าง Project

สร้าง Projects อื่นๆ ตัวอย่างนี้สร้าง Project mirror สำหรับติดตั้ง NKP

กรอกข้อมูล Project

Project ที่สร้างขึ้น

K8S Sizing and Key Consideration

แนวทางเบื้องต้นเพื่อใช้ในการ Sizing ขนาดของ Kubernetes Cluster สำหรับ Application ใช้งานใน Kubernetes Environment สามารถใช้แนวทางดังนี้ในการพิจารณา

ต้องพิจารณาปัจจัยหลักๆ ประกอบด้วย 4 ปัจจัยคือ

Pods per node density

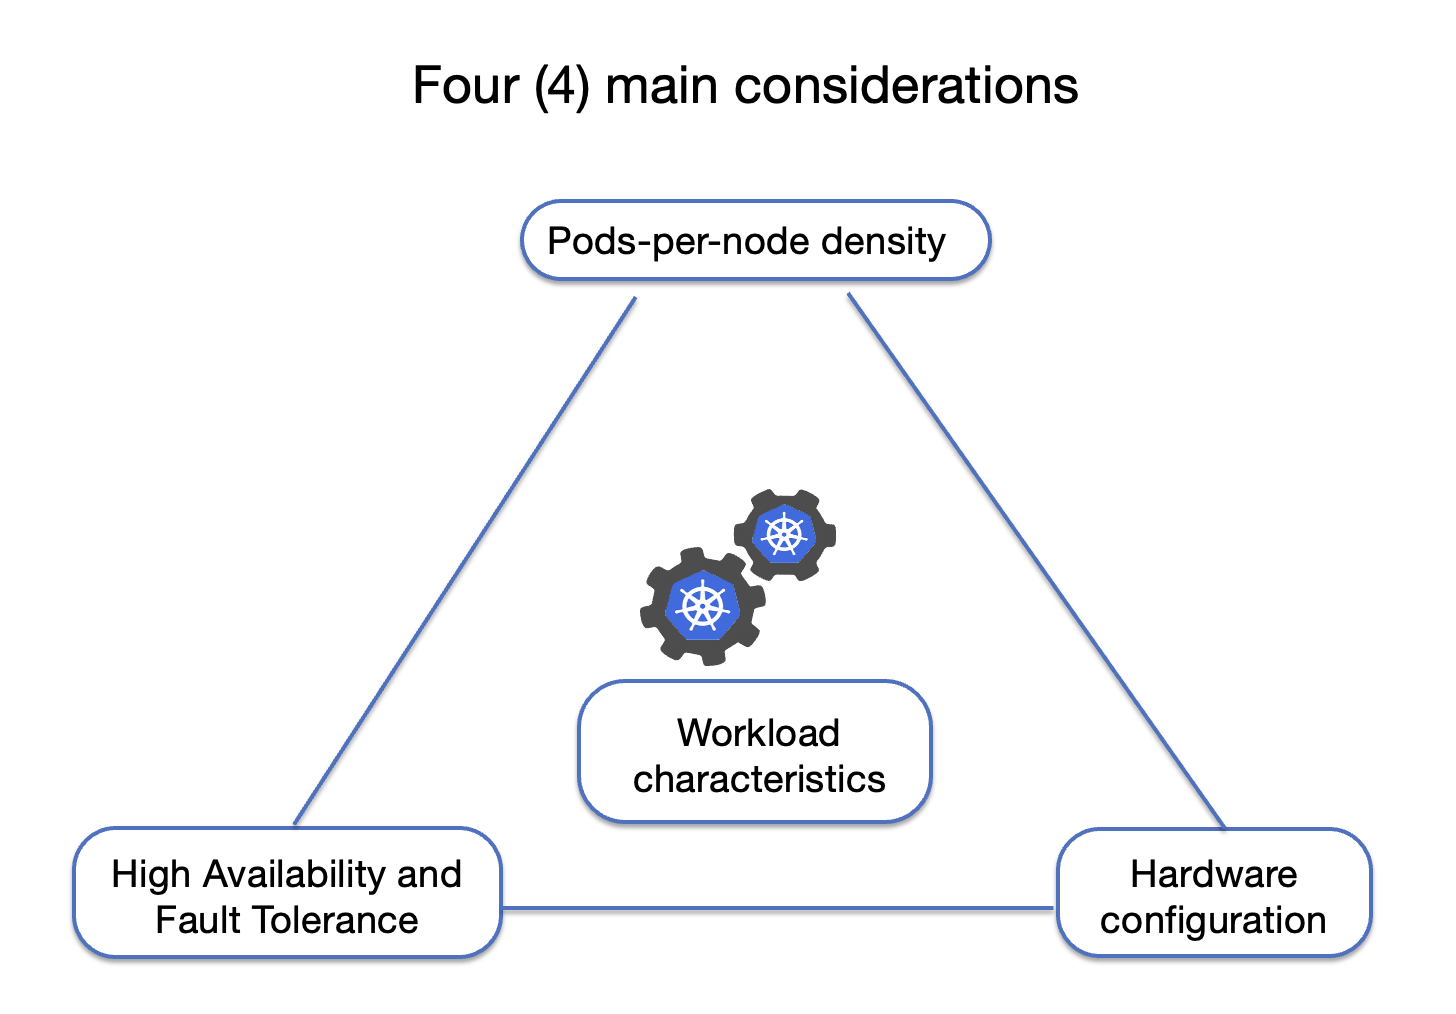
คือจำนวนของ Pod ซึ่งเป็น deployable unit (containers) ที่สามารถทำงานได้ต่อหนึ่งเครื่อง (Node) โดยเราต้องมีข้อมูล

  • vCPU ที่ pod ใช้งาน อาจจะใช้ cpu limit (ปกติจะต้องทำ cpu limit ไว้ เพื่อไม่ให้ pod ใช้ cpu ของเครื่องหมดจนส่งผลกระทบทั้ง cluster)
  • vCPU ของเครื่อง (Node) สำหรับใช้ในการ run pod
  • vCPU ทั้งหมดของเครื่อง (Node)
  • เปอร์เซ็นต์ของ cpu ที่จะ reserve ไว้สำหรับงานอื่นๆ เช่น system process

จากนั้นก็จะสามารถหาค่า pod per node density ได้จากการหาว่ามี vCPU สำหรับใช้ได้จริงเท่าไหร่ แล้ว หารด้วยค่าเฉลี่ยของ vCPU ที่ pod ใช้งาน เช่น

Node VM มี 8 vCPU และต้องการ reserve vCPU ไว้ 15% สำหรับ system process โดยค่าเฉลี่ยที่ pod ใช้งาน cpu core คือ 0.2 vCPU ต่อ Pod ก็จะหา pod per node density ได้ดังนี้

vCPU ที่ใช้งานได้ = 8 – (8*15/100) = 6.8 vCPU

Pod per node density = 6.8/0.2 = 34

** การกำหนดค่าเฉลี่ย vCPU ที่ pod ใช้งาน ต้องพิจารณา pods per CPU core จากคำแนะนำของ Kubernetes ที่ 1 CPU core จะสามารถรองรับได้ที่มากที่สุด 10 pods และจำนวน pod ต่อ Node ไม่ควรเกิน 110 pods – https://kubernetes.io/docs/setup/best-practices/cluster-large/

Master Node’s hardware config

ใช้ข้อมูลจาก kubernetes.io สำหรับเลือกขนาดของ Master Node

และต้องพิจารณา size ของเครื่องเพื่อรองรับ etcd คือ

ซึ่งถ้าต้องการ high availability จะต้องมีจำนวน node เป็นเลขคี่ตั้งแต่ 3 ขึ้นไป (Quorum)

ตัวอย่างเช่น ถ้าเรามี Worker node อยู่ 11 Node และต้อง support client จำนวน 500 client เราต้องใช้ Master node ด้วย spec 4vCPU memory 15 GBs

Number of Master Node in Cluster

เพื่อให้ระบบทำงานได้แม้จะมี Master node บางตัวไม่สามารถทำงานได้ ต้องพิจารณาจำนวนของ Master node ดังนี้

ตัวอย่างเช่น ถ้าต้องการให้ระบบยังคงทำงานได้ กรณีที่มี Master Node 2 ตัวเกิดปัญหา เราต้องเลือกจำนวน Master Node เป็น 5

High Availability and Fault Tolerance

ปัจจัยที่ต้องใช้ในการพิจารณามีดังนี้

  • จำนวน Node ที่มีปัญหา ณ​ เวลาใดเวลาหนึ่งพร้อมกัน
  • Node ที่ต้อง reserve ไว้ในกรณีที่มีการ update ระบบ
  • Pod per node density
  • จำนวน Node ที่เหลืออยู่หลังจาก Failure
  • จำนวน Capacity ที่เหลือสำหรับให้ Pod ทำงานได้หลังจาก Failure
  • จำนวน CPU core ที่เหลืออยู่หลังจาก Pod ทำงานเรียบร้อย หลังจาก Failure (rescheduling)

การหาจำนวน Node เช่น ถ้าเรามี 100 pods และต้องการให้ run 34 pods ต่อ node โดยสามารถ fail ได้ 2 Node ต่อเนื่อง และรองรับกรณี upgrade ระบบ ก็จะคำนวณ sizing ของ Node ได้คือ

100/34 + 2 + 1 = 6 worker node

การหา capacity ที่เหลือ และ pod per node density หลังจาก failure

เช่น มี pod จำนวน 100 pods ทำงานกระจายใน 6 node เมื่อมี 2 nodes ไม่สามารถให้บริการได้

จำนวน pod per node density เบื้องต้น = 100/6 = 16.6

จำนวน node ที่เหลืออยู่หลังจาก failure = 4 Node ซึ่งก็คือ resource หายไป 33% ของทั้งหมด

ทำให้ pod per node density เพิ่มขึ้นเป็น = 100/4 = 25

หลังจากได้ pods per node density แล้วต้องคำนวณด้วย cpu core ที่ pod ใช้งานถึงจะ sizing ขนาดของ node ได้ว่าจะต้องเผื่อ cpu และ memory ไว้ที่เท่าไหร่ถึงจะเหมาะสม

** Kubernetes support cluster auto scaling ได้ในกรณีที่ pod ไม่สามารถ scheduling ได้เนื่องจาก resource มีไม่เพียงพอ https://kubernetes.io/docs/concepts/cluster-administration/cluster-autoscaling/ แต่ก็จะมีช่วงเวลาที่ pod ไม่สามารถทำงานได้ในระหว่างที่มีการสร้าง node ใหม่เพื่อ join เข้ามาใน cluster

Workload Characteristic

เพื่อที่จะได้ค่า cpu และ memory ที่ pod ต้องการใช้จะต้องมีข้อมูลการทำงานจริงของ pod แล้วนำมาหาค่าเฉลี่ยเพราะแต่ละ pod ประกอบด้วย container ที่ application ถูกสร้างด้วย technology, architecture, algorithm ที่มี load หรือ usage แตกต่างกันในแต่ละช่วงเวลาการใช้งาน ตัวอย่าง memory ต่อ container ของแต่ละภาษา เช่น

  • Legacy JEE. 2Gb+ mem per container
  • SpringBoot 1Gb+ mem per container
  • NodeJS. 256Mb+ mem per container
  • Go 256Mb+ mem per container

Case Study

หา Sizing ของ Kubernetes Cluster เพื่อรองรับ 100 Springboot containers โดยมีข้อมูลดังนี้

  • Pod ทำงานโดยใช้ 0.2 vCPU และ Memory 0.4 GB
  • จำนวน pod per node density เท่ากับ 34
  • สามารถ fail ติดต่อกันได้ 2 ครั้ง
  • มี node ไว้ reserve สำหรับการ upgrade
  • ต้องมีการสำรอง resource ไว้ 15% สำหรับระบบ

KIND – Kubernetes in Docker

kind เป็น tool ตัวหนึ่งที่น่าสนใจสำหรับ run Kubernetes อยู่ที่เครื่องเราเองโดยใช้ Docker container เป็น nodes ของ Kubernetes ข้อดีคือจัดการง่ายและทำงานได้เร็ว ถ้าต้องใช้ script เพื่อสร้าง cluster เพื่อทำ integration test แล้ว tool ตัวนี้ตอบโจทย์ได้ดีทีเดียว ติดตั้งเพื่อใช้งานทำได้ตาม quick start

ตัวอย่าง command ต่าง ๆ สำหรับใช้งาน kind

สร้าง cluster ที่มี Master และ Worker จำนวน 1 node

kind create cluster --name test1

สร้าง cluster ที่มี Master และ Work อย่างละ Node จาก configuration file

kind create cluster --name=test2 --config kind-2node.yaml

# ข้อมูลใน File kind-2node.yaml
kind: Cluster
apiVersion: kind.x-k8s.io/v1alpha4
nodes:
- role: control-plane
- role: worker

สร้าง cluster ที่มี Master จำนวน 3 nodes และ Worker จำนวน 2 nodes

kind create cluster --name=test3 --config kind-5node.yaml

# ข้อมูลของ file kind-5node.yaml
kind: Cluster 
apiVersion: kind.x-k8s.io/v1alpha4
nodes:
- role: control-plane
- role: worker
- role: worker

ในกรณีที่ใช้ docker-machine เพื่อสร้าง docker engine จำเป็นต้องระบุ ip ของ docker engine ใน file config ด้วย กรณีต้องการ config ค่าอื่นๆ ดูได้จาก kind document

# หา ip ของ docker engine ด้วย
❯ docker-machine ip
192.168.99.102

# จากนั้นสร้าง config file ดังนี้
kind: Cluster
apiVersion: kind.x-k8s.io/v1alpha4
networking:
  apiServerAddress: "192.168.99.102"
  apiServerPort: 6443
nodes:
- role: control-plane
- role: worker

การ access เข้าไปที่ node

docker ps

# test1-control-plane เป็นชื่อ Master node จากผลลัพธ์ docker ps
docker exec -it test1-control-plane bash

การ access container ที่ run ที่เครื่อง test1-control-plan ซึ้ง container runtime ใน node จะเป็น containerd นะครับ

root@test-control-plane:/# crictl ps
CONTAINER           IMAGE               CREATED             STATE               NAME                      ATTEMPT             POD ID
fd7b628af2359       296a6d5035e2d       20 minutes ago      Running             coredns                   0                   f068e76bb133e
67db85b7b5293       296a6d5035e2d       20 minutes ago      Running             coredns                   0                   1d773ed216c4e
1e94aff11ee8e       e422121c9c5f9       20 minutes ago      Running             local-path-provisioner    0                   6c9467c5cdb84
9599b04fdad77       6de166512aa22       20 minutes ago      Running             kindnet-cni               0                   1a9a398e62418
f55a566a3f556       0e124fb3c695b       20 minutes ago      Running             kube-proxy                0                   c075e7b86e928
6927ff1f38141       0369cf4303ffd       20 minutes ago      Running             etcd                      0                   92b0750af4e4c
6eaab86c31d42       94ffe308aeff9       20 minutes ago      Running             kube-apiserver            0                   34bbfc2183651
5a861837a686e       96a295389d472       20 minutes ago      Running             kube-controller-manager   0                   571c1b03041e7
7f5d355589866       1248d2d503d37       20 minutes ago      Running             kube-scheduler            0                   9d92fc037f002

สร้าง Kubernetes pod

kubectl run nginx --image=nginx

สร้าง Kubernetes service

❯ kubectl expose pod nginx --port=80 --target-port=80 --name=nginx-http --type=NodePort


# ทดสอบเรียก service
root@test-control-plane:~# kubectl get nodes -o wide
NAME                 STATUS   ROLES                  AGE   VERSION   INTERNAL-IP   EXTERNAL-IP   OS-IMAGE       KERNEL-VERSION         CONTAINER-RUNTIME
test-control-plane   Ready    control-plane,master   18m   v1.21.1   172.18.0.3    <none>        Ubuntu 21.04   4.19.130-boot2docker   containerd://1.5.2
test-worker          Ready    <none>                 18m   v1.21.1   172.18.0.2    <none>        Ubuntu 21.04   4.19.130-boot2docker   containerd://1.5.2

root@test-control-plane:~# curl http://172.18.0.2:30108
<!DOCTYPE html>
<html>
<head>
<title>Welcome to nginx!</title>
<style>
html { color-scheme: light dark; }
body { width: 35em; margin: 0 auto;
font-family: Tahoma, Verdana, Arial, sans-serif; }
</style>
</head>
<body>
<h1>Welcome to nginx!</h1>
<p>If you see this page, the nginx web server is successfully installed and
working. Further configuration is required.</p>

<p>For online documentation and support please refer to
<a href="http://nginx.org/">nginx.org</a>.<br/>
Commercial support is available at
<a href="http://nginx.com/">nginx.com</a>.</p>

<p><em>Thank you for using nginx.</em></p>
</body>
</html>
root@test-control-plane:~# exit

สร้าง kube config ที่ master

cp /etc/kubernetes/admin.conf ~/.kube/config

แสดง log ของ cluster จาก kind cli

kind export logs --name=test2

ลบ cluster

kind delete cluster --name test1

Restart docker, ในกรณีที่ restart เครื่อง ต้อง start docker image ของ Master และ Worker nodes

docker start <name>-control-plane
docker start <name>-worker
export KUBECONFIG="$(kind get kubeconfig-path --name="<name>")"